Tuesday, July 9, 2013

Gluten Free Pie Crust

No gluten free people actually ate this pie crust.  In fact, I think I'm the only person who ate this pie crust.  You may be surprised, but I'll tell you a secret... this is not the first time I made something and then ate it all by myself.


I made this pie crust to serve at my book club gathering with the lemon meringue pie dip you finally get to hear about tomorrow.  Unfortunately, my GFF (Gluten Free Friend) had a last minute work emergency and was not able to join us for book club so everyone ate the dip with the regular pie crust I told you about yesterday.... Not that we all couldn't have eaten this version.  It was very tasty and I doubt anyone would have noticed the missing gluten if I hadn't told them.

This crust did taste different than my regular pie crust but I think that had more to do with the lemon juice that's in it than the gluten free flour.  However, the lemon flavor went just perfectly with the lemon flavor of the dip.

The texture of the crust was great - it held up really well for dipping and it was light and crispy.  I've heard that a lot of gluten free pie crusts tend to be super crumbly and fall apart, but I didn't find that to be the case with this recipe.  I think it might have to do with the addition of the fruit pectin or Instant ClearJel (which BTW is not packed in GF facility so may have trace amounts for those of you who are super gluten free).  I think this ingredient helps the crust stick together - fruit pectin is used to make jelly so its "jelling" quality is useful.

So, even though this recipe has not been GFF approved, I still think it's a good one.  I'm sure I'll make her a pie again eventually and will get her seal of approval (or not).


Gluten Free Pie Crust

Adapted from King Arthur Flour
Makes enough for a single pie crust

Ingredients
1 1/4 cups Gluten Free All Purpose Flour
2 T Sugar
2 tsp Fruit Pectin (or Instant ClearJel, optional)
1/2 tsp Xanthan Gum
1/2 tsp Salt
6 T cold Butter
1 Egg
2 tsp Lemon Juice or Vinegar
1 T Cold Water


Instructions

Whisk together the flour or flour blend, sugar, fruit pectin, xanthan gum, and salt.

Cut the cold butter into pats, then work the pats into the flour mixture till it's crumbly, with some larger, pea-sized chunks of butter remaining.

Whisk the egg, lemon juice and water together till very foamy.  Mix into the dry ingredients.  Stir until the mixture holds together (if it still looks to try to stick together you can add more water, 1 tsp at a time).

Shape into a ball, cover in plastic wrap and chill for an hour, or up to overnight.

Roll out on a piece of plastic wrap or a surface that has been floured with gluten free flour. Fill and bake as your pie recipe directs. 

Enjoy!
Julie

Monday, July 8, 2013

My Favorite Pie Crust

I find it kind of funny that I don't make more pie.  Everyone loves pie and if they don't they're weird.  But for some reason I usually save pie for Thanksgiving and Christmas.  It's actually completely backwards that I don't make pie all summer because that's when all the beautiful fruit is available.  Plus you get to eat it with ice cream.  Forget about crisps and crumbles, it's all about the pie!

Not that I made real pie today... I just made pie crust.


This crust was made as a dipper for a lemon meringue pie dip (but you have to wait two days to hear about that... sorry for the tease, it's a function of the blog world.  If I told you everything today then we wouldn't have anything to talk about tomorrow).


This crust is really quite perfect to me.  I've made a lot of different pie crust recipes (including the one from the Bouchon Bakery Cookbook) but I always go back to this recipe.  The result is light, flaky and buttery.  It's also easy to make and it has vodka in it.  Which makes it better because booze makes everything better.  There's actually science behind it... I know science is boring but this will only take a second.

The vodka evaporates more quickly than water when it bakes so using some vodka helps keep the crust from getting soggy.  Also, alcohol does not aid in the formation of gluten and gluten is the thing that makes bread chewy... chewy pie crust is bad so you want to keep the gluten down in pie crust (which is why you don't knead or mix up pie dough too much either).


Let's recap what we learned today.

1.  Pie is good.
2.  Liquor is good. 
3.  Liquor is good in pie.

See, that was easy?  So, yeah, I love this pie crust and will probably use it forever.


Pie Crust

Adapted from Williams Sonoma
Makes enough for a single pie crust

Ingredients
1 1/4 cups All Purpose Flour
1 T Sugar
1/4 tsp Salt
1 stick cold Butter, cut into 1/4" cubes
1 1/2 T Vodka, chilled
up to 1 1/2 T Water, chilled

Instructions
In a Stand Mixer: In the bowl of a stand mixer fitted with the paddle attachment stir together the flour, sugar and salt.  Add the butter mix on low speed until the texture resembles coarse cornmeal, with the butter pieces no larger than small peas. Add the vodka and mix on low speed until incorporated.  Add the water in 1/2 T increments until the dough just pulls together and still has a few crumbs (you may not need all the water).


In a Food Processor: Pulse together the flour, sugar and salt in the food processor.  Add the butter pulse until the texture resembles coarse cornmeal, with the butter pieces no larger than small peas. Add the vodka and pulse until incorporated.  Add the water in 1/2 T increments and pulse until the dough just pulls together and still has a few crumbs (you may not need all the water).

Transfer the dough to a work surface, pat into a ball and flatten into a disk. Wrap it in plastic wrap and chill for at least one hour.  Roll out on a piece of plastic wrap or a floured surface. Fill and bake as your pie recipe directs. 

Enjoy!
Julie

Friday, July 5, 2013

Quinoa Mac & Cheese aka Cheesy Quinoa Casserole

I skipped a day talking about my book club dinner to celebrate my 100th post but now it's back to business.  I've been seeing recipes for mac & cheese made with quinoa for a while and pinned this one months ago.  Book club offered the perfect reason to make it.


The picture in my head of this mac & cheese looked like mac & cheese just without the noodles.  The sauce in my head was very much cheese sauce.

This recipe is certainly cheesy (especially since I added more cheese than the original recipe called for) but it's more like a cheesy casserole than straight up mac & cheesy. 

If I really just wanted mac & cheese with quinoa subbed for the mac, I'm not sure why I didn't just use a mac & cheese recipe and make the substitution.

Anyway, the process of making this dish is pretty easy.  Saute up leeks, red pepper, tomato and garlic.  Add the quinoa and cook until toasty.  Add the broth and cook the quinoa until it's cooked through.  The cooked quinoa gets mixed with eggs, milk and cheese and baked.

The resulting mixture, before it's baked, is pretty darn soupy.  I was glad that the original recipe warned me of this because I might have freaked out and started trying to strain it or something.


Once the mixture is baked it thickens up nicely and has the consistency of a rice casserole - still moist but it holds together when you scoop it out.

The flavor here is good - I like what the addition of the leeks bring to the table and it had a good, strong cheese flavor.  The ladies liked it but agreed that it was no mac & cheese.  CA liked it too, probably more than the girls did. (Yes, I let him eat the book club food, he just has to do it in a different room.  Trust me, he likes it better that way.)  As he was eating leftovers today he said that it tasted like cheesy grits and we should eat them for breakfast.  That's probably the best description of this dish - cheese grits with the nutty flavor you get from quinoa.  He's so smart.


Quinoa Mac & Cheese
Adapted from Moni Meals

Ingredients
2 tsp Olive Oil
1 medium Leek, halved and sliced
1/2 of a Red Pepper, diced
1/2 of a large Tomato, diced
1 1/2 cups Quinoa, rinsed
2 cloves Garlic, minced
3 cups Unsalted Chicken Stock (you can use salted, but reduce or eliminate the salt in the recipe)
1/4 tsp Salt
1/4 tsp Pepper
2 large eggs
1 cup milk of choice (I used 1/2 cup regular milk and 1/2 cup buttermilk)
8 oz. Cheddar Cheese, grated


Instructions
Preheat the oven to 350 degrees.  Coat a 13-9 baking dish with cooking spray.

Heat the oil in medium saucepan over medium heat. Add leek, red pepper and tomatoes.  Cook until tender, about 5 minutes.  Stir in the quinoa and garlic and cook an additional 3-4 minutes until the quinoa just begins to turn a light golden brown.

Stir in the chicken stock, salt and pepper.Cover and reduce the heat to medium-low.  Summer for 20 minutes until most of the liquid is absorbed. 

Whisk together the eggs and milk.  Stir the egg mixture into the cooked quinoa mixture.  Stir in the cheese.  The mixture will look pretty soupy but it will set up when it's baked.  (I made the recipe up to this point and then refrigerated it overnight.  If you're baking it straight out of the refrigerator you'll need to add about 15 minutes to the baking time.)

Bake for 30-45 minutes until it is browned around the edges.  Serve hot.

Enjoy!

Julie

Thursday, July 4, 2013

Baking Bouchon - Recipe 41: Bouchons

Holy Crap... this is my 100th blog post.  I can't believe it's happened so fast.  I started this blog about four and a half months ago and I couldn't possibly having any more fun.  I am baking more than ever because you all give me an excuse.  I have to have something to blog about so if I'm ever bored, I just bake something... anything.

I promised myself I would be completely honest with my blog posts and tell you when I screw up.  In fact, some of my favorite posts are the ones when things go wrong which typically involves me burning food or myself.   If it's OK with you guys I'll keep up the cooking, baking and posting even if it is sometimes hazardous to my health.


I thought it would be quite fitting that my 100th post be on Bouchons which is the namesake cake of Thomas Keller's bakery and cookbook.  Just think how amazing something needs to be for you to name a whole bakery after it.  Imagine my disappointment when I learned these are just brownies.  I know, right?


Don't get me wrong, these are very good brownies.  They're fudgy and dark chocolately and have chocolate chips in them.  I like them a lot but they're just brownies.

The batter is relatively easy to assemble... you mix together flour and cocoa powder.  You whisk together eggs, sugar and vanilla paste.  You add butter and the dry ingredients and mix in the chocolate chips.  Pretty simple.

I went ahead and bought the silicone mold that is required to make these.  The shape resembles a cork or bottle stopper, which is "bouchon" in French.  There's your language lesson for today.


For your amusement today you can see above that I had a small issue.  I baked the bouchons for the recommended amount of time and let them cool a little bit before I unmolded them.  Ummm, they definitely were not done.  The middles were completely gooey.  For a whole 30 seconds I contemplated leaving them that way.  I have no problem eating half baked dough but then I reconsidered, did my best to shove them back in the molds and put them back in the oven.  Luckily they came out just fine after the second bake.


So, Happy 100th post my dear readers.  I hope you find the next 100 as enjoyable as the first.  I promise they will contain approximately 50 pounds of butter and sugar, 100 pounds of flour and at least a couple of vegetables.

Oh yeah, and it's also Independence Day - Happy Birthday USA - love ya! 

Enjoy!
Julie


Wednesday, July 3, 2013

Grilled Basil Lime Chicken

Yesterday I told you all about the Hot Blueberry Cheddar Dip that I served as an appetizer to my beautiful book club ladies.  Today I'm going to tell you all about the main course.  Actually, you're going to hear about this book club dinner for a while since I still have a side dish and three dessert components to tell you about.  I personally love making book club dinners because...

(1) I love the ladies who come to book club.
(2) My guests are always very appreciative of the effort I put into making the meal.
(3) I get to be challenged in my cooking because we have a pseudo gluten free book club (one of our members is gluten free - she may think it's an obstacle but I like it).
(4) Book club dinners always include dessert.
(5) They also include a little bit of discussion about the book and a lot of discussion about the latest cover of US Weekly and bad reality shows.


This chicken was perfect to serve at book club because most of the prep is done the day before.  The chicken is marinated overnight in lime juice, mustard, Worcestershire, soy sauce, olive oil, garlic, green onions.  That way, when I got home from work all I had to do was plop these little buddies on the grill.  (You should read that to say that CA manned the grill... he's the perfect book club husband in that he grilled the chicken and promptly disappeared so we could have girl talk.  I'm pretty sure he wanted to be as far away from that as possible.)

After the chicken is grilled it gets drizzled with a mixture of lime juice, olive oil, green onions, garlic and basil while it's still warm.  The fact that the sauce is not cooked really keeps the flavor light, fresh and summery.


I really liked that this dish is healthy and still really flavorful.  The lime and basil flavors are incredibly bright.  My ladies liked it and so did CA so I guess it's lady and man approved food.


Grilled Basil Lime Chicken
Adapted from Goodeness Gracious
Serves 6

Ingredients

For the Marinade
2 Limes, zested and juiced
3 T Olive Oil
3 T Dijon Mustard
3 T Worcestershire Sauce
3 T Soy Sauce
3 Green Onions, chopped
2 cloves Garlic, minced
1/4 tsp Pepper
1/4 tsp Salt
3 lbs Chicken Breasts (I had 4 large breasts and cut them in half)

For the Sauce
1 Lime, zested and juiced
1/4 cup Olive Oil
3 Green Onions, chopped
2 cloves Garlic, minced
3 T Basil, chopped

Instructions
Combine the ingredients for the marinate in a large plastic baggie.  Add the chicken to the bag and squeeze to make sure the chicken is completely covered.  Refrigerate for at least 2 hours or overnight.

Combine all the ingredients for the sauce in a small bowl.  This can be done just before cooking the chicken or up to a day ahead.

Preheat the grill and grill the chicken until cooked through - approximately 8 minutes per side.  Remove the chicken from the grill, cover with aluminum foil and let it rest for 10 minutes.

Slice the chicken, put it on a platter and top with the sauce.

Enjoy!
Julie

Tuesday, July 2, 2013

Hot Blueberry Cheddar Dip

Holy crap this stuff is good!  It's about the weirdest sounding combination of things but I assure you that it's quite amazing.


PS, this is also about the easiest recipe in the world.  I'm not joking... you mix together 4 ingredients and bake it.  That's it!

OK, so you do want to be a little bit careful when you're mixing everything together that you don't totally smash the blueberries.  I mixed the cream cheese, cheddar cheese and nutmeg together first and then folded in the blueberries.  That's my only caveat, I swear.


While this sounds like an odd combination you must trust me that it is not.  It's got that salty sweet thing going on that I absolutely adore.  The sweet blueberries get hot and burst right open into the salty cheese mixture.  I'm telling you, it's freakin' amazing.  It was so good that I burned the crap out of the roof of my mouth because I couldn't wait for it to cool down before I ate it.  (Note to self to pull it out of the oven a few minutes before serving to save yourself guests from injuries.)

I served this to some of my favorite ladies for our book club gathering and it was a smashing success.  They all really loved it.  The original recipe recommends serving it with toasted bread, but I cheated and served it with pita chips and tortilla chips.  I originally thought that the pita chips were the way to go (in fact, I only put the tortilla chips out because my GFF (Gluten Free Friend) was attending) but everyone agreed that the tortilla chips were the preferred dipping device. 

I will definitely be keeping this recipe in the rotation.  It's really a unique and delicious thing to serve to guests and takes approximately zero time to make.  Everybody wins.


Hot Blueberry Cheddar Dip
Adapted from How Sweet It Is

Ingredients

8 oz. Cream Cheese, softened
7 oz. white cheddar cheese, grated
1/4 teaspoon nutmeg
1 cup Blueberries
Pita Chips, Tortilla Chips or Toasted French Bread for Serving

Preheat oven to 375 degrees.

In a bowl, mix cream cheese with grated cheddar and nutmeg. Fold in blueberries. Place in an oven-safe dish and bake for 30-35 minutes, or until cheese is hot, golden and bubbly, and blueberries and bursting.

Serve hot with pita chips or toasted french bread slices.

Enjoy!
Julie

Monday, July 1, 2013

Baking Bouchon: Recipe 40 - Rhubarb Tart

I made a bunch of mini rhubarb tarts and now I'm tired.  This recipe is another one in this cookbook that is pretty labor intensive.  Nothing about it was all that hard, but there are four components that needed to be made over the course of a couple of days so it took quite a bit of effort.


Technically, I was supposed to make one large tart and that probably would have taken less time but I can't seem to get rid of big ole' desserts.  Mini ones are so much easier to give away.


Component #1: Pâte Sucreé

I've made this a few times before - it's a sweet pie crust,  kind of like a sugar cookie.

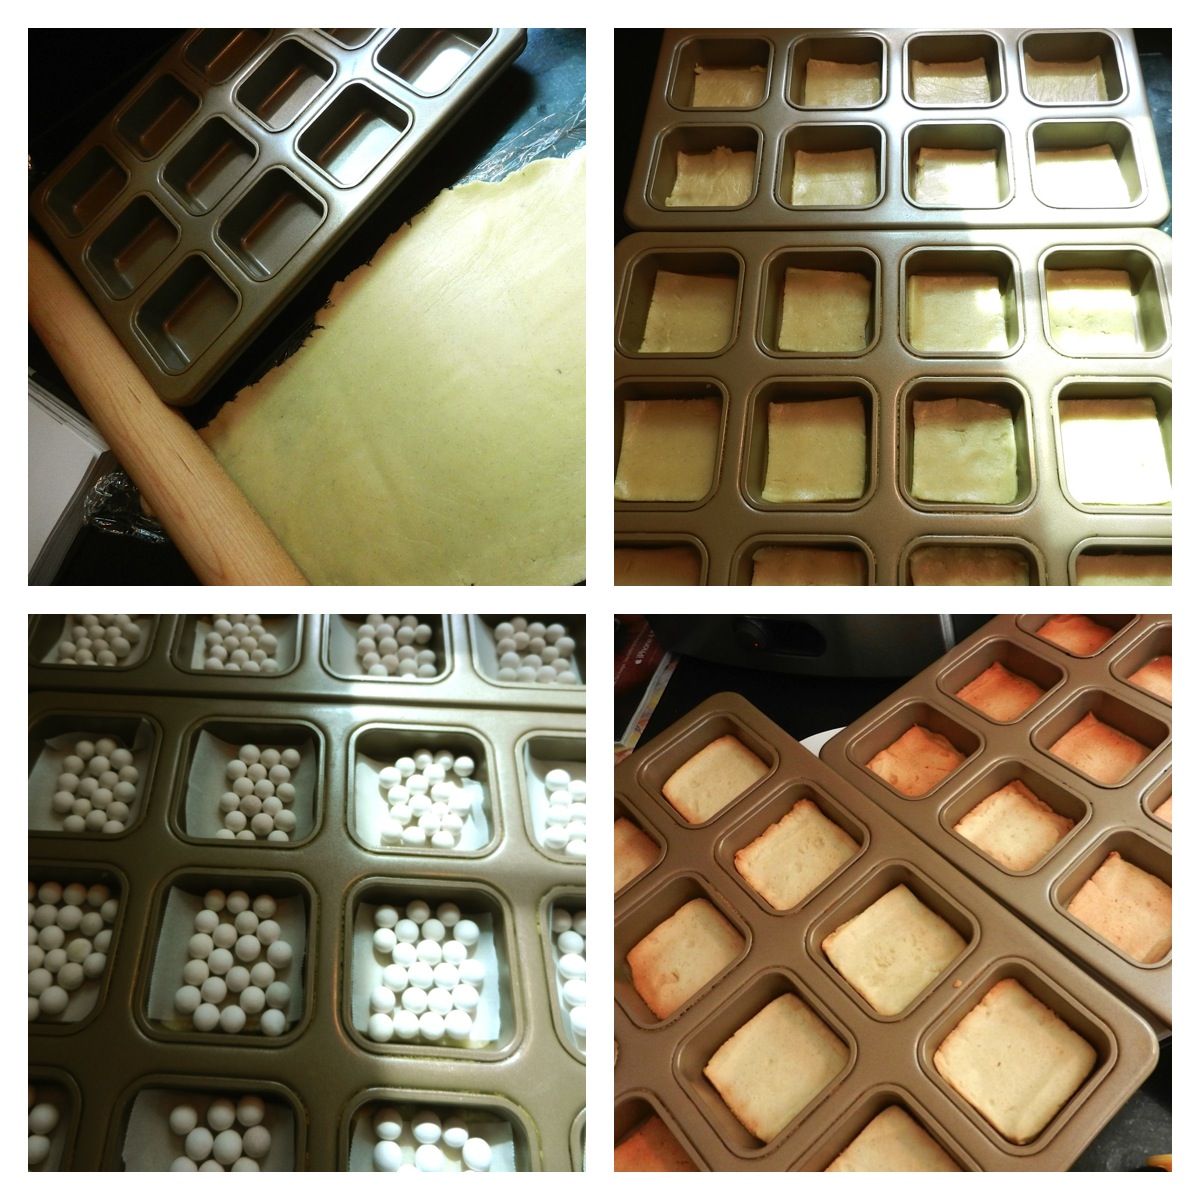
The dough gets rolled out and (for mini tarts) cut into squares and placed into my brownie pan.  This pan is awfully handy; big shout out to my sister for randomly giving it to me for Christmas one year.

The dough gets covered with parchment, weighted down and baked until golden.


Component #2 - Brown Butter Filling

This is a yummy combination of almond flour, regular flour, eggs, sugar, milk, cream and browned butter.

I know we've talked about browned butter here before but I can't seem to remember when or what the recipe was.  To make brown butter you melt butter and boil it until it browns.  Tricky, huh?  It totally changes the flavor of the butter giving it a nutty flavor.  It's much more interesting than regular butter which we already know is delicious, so this must be doubly good.


I was surprised by how thin the consistency of the filling was when it was done.  I expected something more fluffy like almond cream but this was about as thin as pancake batter.

Luckily since it has eggs in it it puffs and thickens up as it bakes.


Component #3 - Cured Rhubarb

I learned that you should peel rhubarb.  Apparently everyone knows this except me, even CA.  When I asked him he said, "of course, it's tough and stringy on the outside".  It seems I've been making tough and stringy strawberry rhubarb pie for years because I never peeled it.

Anyway, the rhubarb gets peeled and soaked in sugar and grenadine for 24 hours to "cure".  I don't know what that means but it did release a ton of water; plus it sweetened up a bit (just a tiny bit, it's still super tart).
Component #4 - Almond Streusel

This stuff is so yummy.  I love streusel - I strongly prefer pies with streusel topping to those with crust on top.  It's just better.

This one is a combination of flour, almond flour, sugar and butter.  It's awfully tasty and I ate quite a bit of it all by its lonesome.  The streusel also gets baked so it develops a lovely little suntan.

The streusel is supposed to be sprinkled on top of the tart after it's cooked.  I neglected to read that and sprinkled it on the raw tart.  Honestly, I think it was fine - in fact I'm afraid it might have just fallen right off I put it on after I baked it.  Therefore, my way is better and I definitely did it on purpose.


These get layered in the following order; 1, 2, 3, 2, 4.  That is, crust, filling, rhubarb, more filling and then streusel.

The verdict?

CA is a big fan which did not surprise me.  He loves strawberry rhubarb pie and doesn't like things too sweet.  These are pretty darn tart tarts , although "well balanced" (his words) so he was very pleased.

I liked them.  However, I have the same problem with these that I have with fruit pies, cobblers, crisps and all other desserts that have baked fruit in them.  I don't want to eat the fruit.  I just want to eat the crust and topping that the fruit touched.  You've got to have the fruit flavor but I don't actually want the fruit.  In college, our cafeteria always had cobbler on the buffet and I used to scrape the crust off the top and put that in my bowl.  I didn't want or need the fruit.  I've met people who just like the fruit so hopefully those people went to my school and were happy to be relieved of the crust.   That was a very long explanation to tell you that I love the flavor of this tart and if I picked out the actual rhubarb it would be just perfect.


Enjoy!
Julie