Showing posts with label Pies and Tarts. Show all posts

Sunday, April 20, 2014

Baking Bouchon - Recipe 94: Hazelnut Streusel Spiced Caramel Chiboust

My hiatus lasted a little longer than I expected.  Stuff happened, it happens.

For those of you who remember my last post know that I spent a week in Kansas at "wife school" which was actually pretty good.  I didn't learn anything about being a wife in the sense of how to cook or clean or iron or curl my hair in the perfect 50's hairstyle but that wasn't exactly the point.  I did learn a lot about how to support Captain America in the new role he'll be taking when we get to Korea (which is happening in 3 days people - I don't know how that snuck up on me) and how to support all the families of the people working with CA.

I also learned a lot about myself.  For example...
  • I took a personality test that told me I'm an extrovert (obviously, considering I can't find enough live people to talk to so I talk to all of you), I'm sensing (given that I often miss the big picture by obsessing with details, I'd say that's right), I'm feeling (my brother in laws don't call me a face faucet for no reason) and I'm judging (which has nothing to do with being judgmental and everything to do with the lists I make for everything.  Except that I'm totally judging you).  This combination of traits makes me a caregiver.  I'm dependable and warm but I'm also very sensitive and need structure in my life so that I don't completely freak out.  Maybe that's why CA makes fun of me all the time for needing a plan.
  • I took another test that told me my conflict resolution style which I could have told you before I took the test is avoidance.  I hate conflict.  It's fine if you don't agree with me, just don't except me to agree with you either.  Let's talk about something else.
  • The other test I took was my leadership style which it turns out avoids everything that has to do with me taking all control or giving up all control.  I like collaboration.  What do you think?


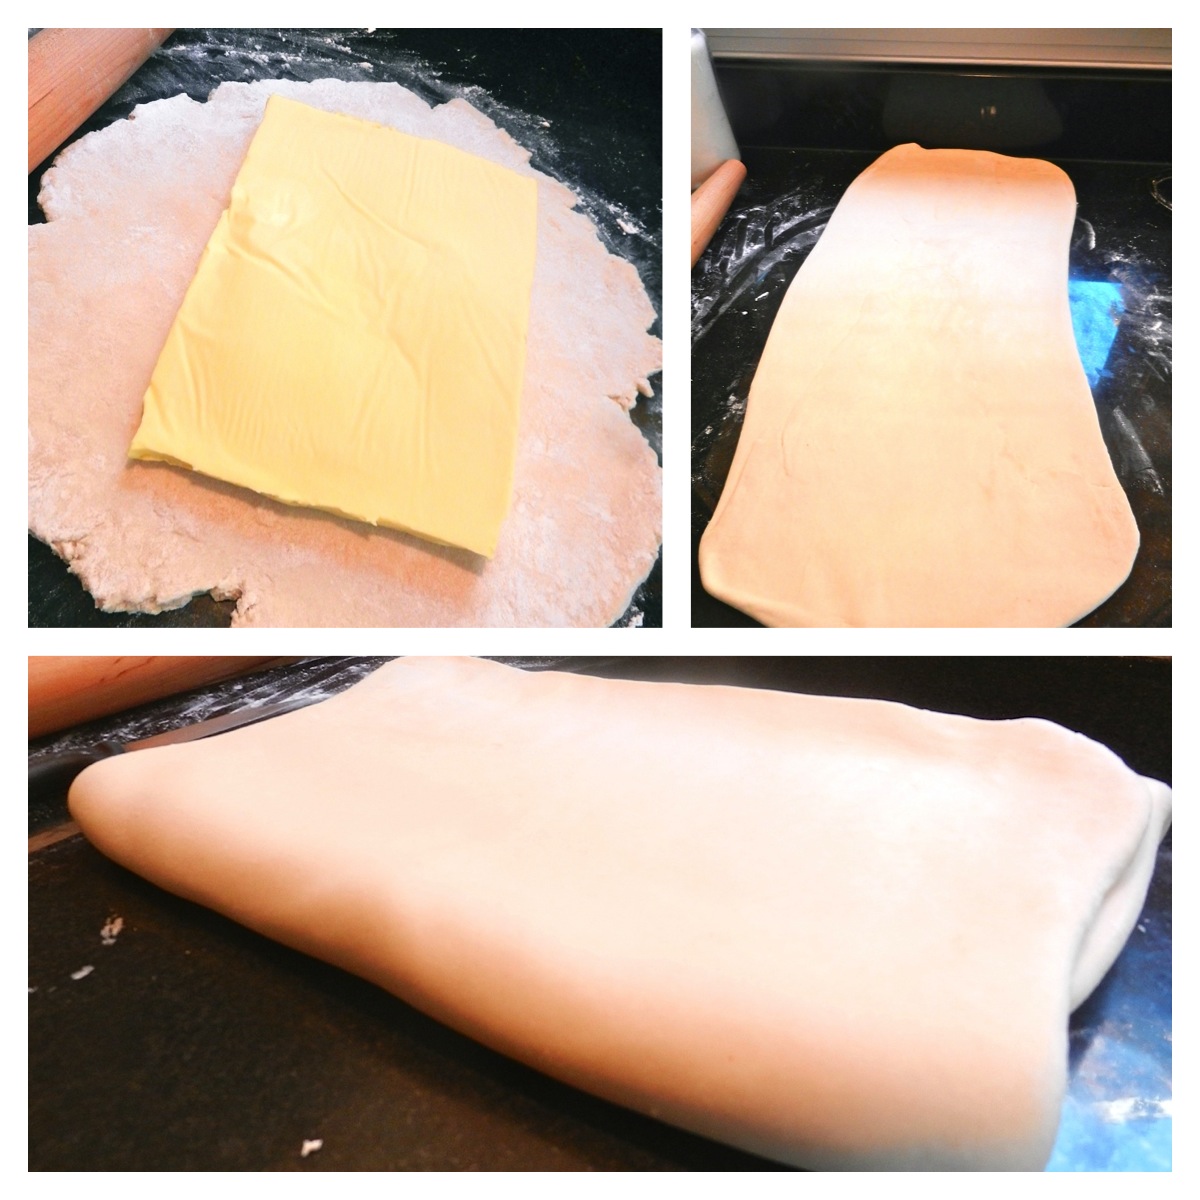
You may have forgotten this is a food blog, I did for a minute too.  I desperately need to tell you about the final recipes in the Bouchon Bakery Cookbook including this Hazelnut Streusel Spiced Caramel Chiboust which is a terrible title that tells you nothing about what it actually is unless you speak bakery.
This thing is essentially two layers.  The base layer is a Hazelnut Streusel which is a shortbread made with primarily hazelnut flour, but it has cake flour and almond flour mixed in as well.


The next layer is a Spiced Caramel Chiboust.  Chiboust is pastry cream that is lightened with whipped egg whites.  I made this a long time ago so I don't really remember how the heck I made it.  Unfortunately, the movers packed my beloved cookbook so I can't go back and read the recipe to remind me.  What I do know is that it took just about every bowl and pot in my house to make this stuff. 
I believe the pictures above show me making the spiced caramel to incorporate into the pastry cream but I can't be sure.
I'm more confident that these pictures show me finishing the pastry cream and folding in the egg whites to finish off the Spiced Caramel Chiboust which gets frozen into a nice flat circle.


Once the Chiboust is set, it is placed atop the Hazelnut Streusel and garnished with peaches.

After all that work and all the dishes I had to clean I absolutely hated this dessert.  The hazelnut streusel was fine but the chiboust was one of the weirdest things I've ever tasted.  It was like licking the bottom of a Chai latte where all the dredges of the spices are but with the consistency of flan.  I also don't understand how the peaches relate to the other flavors at all.  I hated it.  CA didn't like it either.  All he said was "this is weird."  I did not subject anyone else to this dessert, it got tossed in the trash.

This is the last recipe in the Tart section of the Bouchon Bakery Cookbook and it was not my favorite chapter.  A lot of the recipes were really complicated and time consuming to execute.  My hands down favorite was the Caramel Nut Tart.  Making it was a complete disaster, but once I executed it the result was really incredible.

I'll be back tomorrow with something that you might actually want to make.

Enjoy!
Julie

Thursday, March 6, 2014

Baking Bouchon - Recipe 87: Lemon Meringue Tarts

Don't get mad but I totally cheated.  The impending move is making me crazy!  I am completely obsessed with emptying my pantry before we move and it means I've been eating the weirdest foods.  The other day I ate rice mixed with a piece of cheese and a cut up hot dog for dinner.  It was strangely good.  I've also been forcing myself to eat these packets of Cream of Wheat that I bought and I hate.  I thought it would be an alternative than my typical work breakfast of oatmeal.  It's disgusting, but I keep eating it.  My friend makes fun of me because she says that what I'm forcing myself to eat costs approximately $0.50 and I spend way more than that on my daily coffee.

My cheating here consisted of using a jar of Lemon Curd for these Lemon Meringue Tarts instead of making my own.  I've made the lime version of the curd in the Bouchon Bakery Cookbook and it's amazing so I'm sure that the lemon version is also amazing, but I couldn't make lemon curd when I had a jar sitting in my cupboard.  I just couldn't.
The base of the tart is Pâte Sucreé which I've made a few times and is a pretty easy sugar cookie recipe.  The tarts don't get baked again once they're filled so the shells need to be fully baked when they're empty.  I was supposed to use these special individual tart shells, but I reused the English Muffins molds I recently bought which I thought was genius.  Plus, they worked perfectly so it pretty much was genius.
There are 3 layers of goodness inside of these tarts.
  1. Madeleine Cake - a lemon cake that I've made before but this time the batter is spread really thin in a baking sheet so the cake is super skinny.  After it's baked it's cut into circles that fit in the bottom of the baked tart shell.
  2. Lemon Curd - my fraudulent curd is the next layer inside the tart
  3. Meringue - standard meringue is piped on top - egg whites whipped with a hot sugar syrup until it's nice and fluffy.

I'm pretty disappointed in myself because this was my opportunity to buy a blow torch and I didn't do it.  The recipe says to use a little kitchen torch to brown the meringue on the top of the tart.  CA says that I can't be trusted with a blow torch which is probably true given that I've set myself on fire before, but I really want to caramelize sugar and meringue with a blow torch.  It's so much more fun that putting it under the broiler in the oven.  BORING!


Overall these are pretty awesome.  I wish they had been a little bit more tart - but they probably would have been if I'd made my own curd.  Whatever - I knocked out a Bouchon recipe AND got rid of a random pantry item.  My obsession trumps everything.

Enjoy!
Julie

Thursday, February 6, 2014

Raspberry Nutella Mini Pies

There are so many things I enjoy about these little pies.
  • I love pie crust
  • I love Nutella
  • I love Nutella with berries
  • I love things in miniature
Pie + Nutella + Berries + Mini = Delicious


These are super easy to make.  Everything in them comes straight from a jar - but that doesn't make them any less delicious.  The original recipe calls for Nutella and Strawberry Jam and I've made these using that flavor of jam before which is delicious.  However, I had a jar of Raspberry Jam already open so I used that instead.  It was also delicious!

This recipe is even easier if you're a cheater and you use store bought pie crust.  I did not do that because I'm thoroughly obsessed with my favorite pie crust recipe and making pie crust is really easy.  I always have butter, flour, sugar and vodka in my house so there's never a need to make a trip to the grocery store.  You don't even technically need the vodka but if you don't have vodka in your house we probably shouldn't be friends.

The hardest part of this whole thing is making sure that you seal the edges of the pies really well.  If you don't, the jam will creep out while they are baking (as you can see from one of my mini pies above).  That defeats the whole purpose of Raspberry Nutella pies and you get Nutella pies... which is not a bad thing, just not what you intended.  I use egg wash, pinch the edges with my fingers and also crimp them with a fork to try and be sure that the edges stick together.  This is also why I used a circle cutter and fold it in half because that leaves one less side for me to worry about.

These are fabulous and easy and people love them.  Besides the fact that they have Nutella in them and they're pies and they're mini, I love that they are sprinkled with a little bit of course sugar before baking which makes them a little bit crunchy. 

I brought them to a baby shower and people gobbled them up.  They're great to serve for a "stand up" party because people can grab one and eat it with no utensils required.  A pie in one hand and a glass of wine in the other is all you really need.  Unless of you course you want a pie in each hand.  That works too.

Raspberry Nutella Mini Pies
Adapted from The Domestic Rebel
Makes approximately 20 pies

Ingredients
1 recipe single Pie Crust Dough (refrigerated is fine or you can use my favorite recipe)
1/4 cup Raspberry Jam (strawberry is great too!)
1/4 cup Nutella
1 Egg
Course Sugar, for sprinkling

Instructions
Preheat the oven to 350 degrees.  Line a baking sheet with a silpat or spray with non-stick cooking spray.
 
Whisk the egg in a small bowl.
 
On a clean, flat work space, roll out the pie dough. Using a 4" circle cutter, cut out rounds of dough. Spoon 1/2 tsp of the Jam and 1/2 tsp of Nutella in the center of each of the circles.  (Collect the scraps and re-roll them to make more pies.)
 
Brush the edges of the circles with the egg.  Fold in half and pinch the edges to seal (you want to try and seal them really well so the filling doesn't seep out when they are baked). Use a small-tined fork to crimp the edges.

Place the sealed pies on the prepared baking sheet.  Brush the tops with the egg.  Sprinkle with coarse sugar.

Bake at 350 degrees for 15-20 minutes until the tops are golden and the edges are lightly crispy.  Cool the pies on the baking sheet slightly before serving (they're also great a room temperature).
 
Enjoy!
Julie

Thursday, December 12, 2013

Thanksgiving Recap: Gluten Free Rum Apple Pie

The end of the Thanksgiving recap has arrived and since we started with pie, we must end with pie.  You didn't actually think that I only served one dessert on the biggest food holiday of the year, did you?  We should get better acquainted.


Because the other pie was a pumpkin/pecan hybrid, I figured that a fruit pie was in order.  Typically, I like my fruit pies to be topped with struesel which makes it more like a fruit crisp which I like better than fruit pie (primarily because I like to eat the crisp part with ice cream and leave the fruit in the bowl.  I need the fruit for flavor but I'd prefer not to actually eat it.)  - however, I wanted to make this dessert gluten free and I had a great pie crust recipe that would fit the bill.  Regardless, I wanted to make sure that the pie was still traditional, but had a little bit of punch to it.  Therefore, I added rum.

It was a no brainer really... if I add liquor to something, CA is more likely to enjoy it.  Plus, the pumpkin pie had bourbon in it, the sweet potatoes had bourbon in them, the turkey was brined in bourbon, the gravy had cognac in it, the stuffing had port in it and the green beans had sherry in them... there was a theme.


Other than a touch of rum, the apples were very traditionally seasoned with sugar, brown sugar and cinnamon.  I added a little cornstarch to make sure that the filling was nice and thick when it cooked... I hate pies that are runny and don't hold up when they're sliced!


Instead of a struesel or a whole slab of crust on top of the pie, I opted for a lattice crust atop the pie which turned out really beautifully!


I was worried that the gluten free crust would crumble and break but it did not.  It sliced and weaved just as you'd hope any pie crust would do.


A little bit of egg wash and a long bake in the oven resulted in a beautifully browned crust!


I'm really pleased with how this pie came out, considering I winged it quite a bit.  The crust was flaky.  The filling was sweet and spicy and held up when sliced.  I wish the rum flavor had been a bit more pronounced (add a little more then the recipe says if you'd like) but a warm slice with a scoop of vanilla ice cream was just what I needed to round out my holiday meal.


Rum Apple Pie (Gluten Free or Not)

Ingredients
2 batches of Pie Crust Dough (Gluten Free Version or Regular Version)
6 Granny Smith Apples, peeled, cored and thinly sliced
1/4 cup Sugar
1/4 cup Brown Sugar
2 T Cornstarch
1 1/2 tsp Cinnamon
2 T Melted Butter
3 T Rum
1 Egg, lightly beaten

Instructions
Preheat the oven to 350 degrees.  Spray a pie plate with non-stick spray.

In a medium bowl, mix together the apples, sugar, brown sugar, cornstarch, cinnamon, butter and rum.

Roll out one of the pie crusts dough and place it in the bottom of the pie plate.  Pour the apple mixture on top of the pie crust.  Roll out the remaining pie crust dough and cut into 14 - 16  1/2 inch strips.  Lay 7 or 8 strips parallel on top of the pie.  Weave remaining strips in with the first set of strips to create a basket weave pattern.  Pinch the edges of the pie crust to seal.

Brush the crust with egg wash.  Bake for 1 hour until the crust is golden brown and the filling is bubbly.  If necessary, cover the pie with aluminum foil to keep the crust from getting too brown.


Enjoy!
Julie

Sunday, December 8, 2013

Thanksgiving Recap: Bourbon Pumpkin Pie with Pecan Streusel

I'm pretty darn proud of myself for getting my Thanksgiving recap started only one week after Thanksgiving.  You might think that it's been a week and a half since Thanksgiving but since I hosted turkey day on Saturday it's only been one week.  Your perspective is irrelevant.

We weren't able to make it home to either of our families this year which was kind of sad.  We're big family people and generally never miss a holiday unless we can help it.  This year we couldn't help it but we definitely made the best of it.  Luckily, we have a few dear friends who don't travel far to see their families so they were back in town by the weekend after the big food fest.  Therefore, we hosted Friendsgiving at our house on the Saturday after Thanksgiving.  The theme of the evening was "Friends don't let friends have just one Thanksgiving" (complete with souvenir koozies courtesy of my GFF)... although some of our friends were enduring their 4th round of turkey and pie.  They all did a good job suffering through and the clean plates after the second helping convinced me the hardship was not too great.

I was super pumped about the tablescape...

Chevron paper table runner (which I did not buy at Anthropologie but you can find on their website)

Gold Candles, Tray, Napkins Rings & Gold Acorns from Pier 1

2008 Shadrach Chardonnay from one of our favorite Sonoma, CA wineries, Munselle Vineyards (wine counts as part of the tablescape and no, I'm not going to tell you how many bottles we drank).

CA was in charge of the turkey and I was too busy preparing the 10 other foods to pay attention to what he was doing.  However, it was freaking amazing... potentially the best turkey we've he's ever made.  We typically fry our turkeys but CA wanted to try something new.  Putting anything else in the oven was not an option (I already had space issues with the oven as Thanksgiving dinner is very casserole centric) so the grill was the only other cooking vessel available.  What I loved about the turkey was that it really took on the flavor of the brine and the smoke of the grill.  You can find the recipe on the Washington Post website.  You should make it.

CA was also in charge of his family's stuffing recipe, the gravy (I make terrible gravy) and cocktails.  I got everything else. While we'll get to the savory food items over the course of the week, I feel it only appropriate that we start with pie.


I struggle with narrowing down the pie selections for Thanksgiving.  There are so many great ones to choose from... pumpkin, pecan, apple, chocolate, cranberry... and don't even get me started on the options if you include non-pie desserts at Thanksgiving (which I only allow if there are 3 or more desserts available).  I've been making this Bourbon Pumpkin Pie with Pecan Streusel for years and I love it because it checks two pie boxes... pumpkin & pecan.


The pie starts with your standard pie crust.  It is then filled with a pumpkin custard that is flavored with cinnamon, nutmeg, cloves (regular pumpkin pie stuff) and bourbon (extra special pumpkin pie stuff).  The topping is a super yummy strudel made with brown sugar, flour, butter and pecans.

I was reading the recipe too fast when I made the streusel and put way too much sugar in it which isn't a terrible thing, but it meant that the streusel didn't hold up as well as it normally does when it was baked.  This was the first of two kitchen mishaps - but all things considered I didn't drop anything, burn anything (badly) or burn myself so it was pretty successful!

 I promise if you make it according to the directions it will be even prettier than this.  I also promise you that even if you screw it up like I did it will still taste amazing


The pumpkin part of the pie is pretty light because there are whipped egg whites  folded into the custard.  You get a great hint of bourbon flavor without overpowering the pumpkin.  The streusel is sweet and crunchy and the texture is the perfect compliment to the creamy pumpkin filling.  I love this pie.

The recipe for this pie can be found on Food & Wine.  It's a really great one to add to your holiday table... If you make it for Christmas dinner I'll feel less guilty about not telling you about it until after Thanksgiving. 

Enjoy!
Julie

Friday, October 4, 2013

Baking Bouchon - Recipe 57: Plum Tarts


This has to be the easiest tart in the cookbook.  Actually, it IS the easiest tart in the cookbook - I peeked.

3 components make up this tart...

1.  Pate Sucree (for the crust)
2.  Almond Cream
3.  Plums

Easy right?  I guess you do actually have to make the crust and the almond cream but luckily I had crust made up and waiting for me in my freezer and almond cream is super easy to make.

If you remember, pate sucree is a crust that is pretty much like a sugar cookie.  Almond cream is just a mixture of flour, almond flour, butter, powdered sugar and eggs.

I ended up making these tarts more difficult that necessary because I made them miniature.  As I've mentioned a thousand times before I want to share my treats with others and things that are miniature are easier to share.

To assemble the tarts you layer crust, followed by almond cream and then sliced plums.  Bake. Done.


These were pretty good.  They weren't particularly exciting but they were good.  They certainly disappeared quickly when I took them to work so I guess other people liked them too.

Sometimes things that are easy surprise you and taste super amazing - sometimes things that are easy and taste like they're easy.  I think the latter is where I'd stick these.


Enjoy!
Julie

Monday, September 23, 2013

Baking Bouchon - Recipe 50: Pear Feuillette

Some days when I'm baking out of this cookbook I feel like I am in French class.  Feuillette is French for puffy pastry... so basically these are pear turnovers.


I didn't have any puff pastry frozen so I had to make it again.  I went ahead and made a couple of batches so that I have enough for the rest of the puff pastry recipes in the cookbook.

Making the pastry takes much longer than making the desserts themselves.  It's really a three day process of refrigerating and rolling and refrigerating some more.  I'm glad I don't have to make it again although I took a sneak peak at the croissant recipes that follow and it looks like a pretty similar process so I'm in for a lot more rolling and refrigerating.

The pears in this dessert are poached in white wine - which is awesome.  I was actually really surprised by the poaching process because I was under the impression that in order to poach something the liquid needed to be hot.  This is not.  Wine, water and sugar are heated together to melt the sugar, then lemon juice it added and the mixture is cooled.  After it's cooled it gets combined with the pears.  Isn't that wrong?  I'm not aware of the technical definition of poaching but this doesn't sound like it.  This just sounds like soaking. 
The other component of this dessert is almond cream which is a combination of almond flour, regular flour, butter, powdered sugar and eggs.

To assemble these little guys you place a dollop of almond cream on top of the puff pastry, top that with some poached pears and then another layer of pastry.

Full disclosure that these are supposed to be in the shape of pears and they're supposed to have a beautiful lattice shape on top.  I was unable to do either because I didn't have a pear shaped cutter or a lattice cutter.  I attempted to freehand the lattice but the holes ended up being too big.  So I changed course and used a straw to cut little holes in the lids.  That ended up working pretty well even if they look like turtles.

The pastries get topped with some egg wash to encourage browning and we're ready to bake.


I get super nervous every time I bake my own puff pastry.  I'm convinced that it won't "puff" but it usually does despite my worrying.

These were super tasty.  Surprisingly, you really can taste the wine in the poached pear.  Plus, puff pastry tastes like butter... so there's that.  The almond cream is actually a really important component because it keeps the whole thing moist.

CA liked them too - I think he ate more of them than I did.  That's usually a good sign.


Enjoy!
Julie

Tuesday, July 30, 2013

Baking Bouchon: Recipe 42 - Apricot Flan Tart

Apparently, I am easily misled.  Put something in a bin with a sign on it and I'll believe that whatever is in the bin matches what's on the sign.


I have no idea what an apricot looks like.  It seems that I think apricots look like nectarines.  I did think they looked pretty similar to the nectarines in the next bin that were labeled nectarines but I didn't think that meant that what I saw in the bin labeled apricots were nectarines.  That would be silly.  Who would mislabel fruit bins?

CA knows exactly what apricots look like - he looked at the nectarines, asked what they were for, and proceeded to tell me that apricots have fuzz on them... like peaches.

No wonder I didn't need 18 pieces of fruit.  I guess apricots are small.


Despite my fruit mix-up, this tart came out fine... yes, just fine.  Not amazing or fantastical or spectacular... just fine.

The tart starts with pate brisee (pie crust).  I was supposed to bake it in a cake ring... whatever the heck that is.  I looked at the photo and decided that baking it in a springform pan (like you use for cheesecake) would yield the right shape and height and I was right.  That small victory made me feel better about mixing up my fruits.

The crust gets baked and ready for all the filling.


The filling is basically pastry cream... Thomas calls it custard but I don't know difference.  I guess it's a little different but not enough for me to understand why I couldn't just make pastry cream...

I don't know what else to say about it, I feel like we talk about pastry cream every week here.

I guess the one difference here is that the custard gets baked again for a very long time so it firms up enough that you can slice the tart and is stays together.


To assemble this tart, you take your baked pie crust and layer in the apricots nectarines.  On top of that goes the custard (a lot of custard... this joker is tall).

All that goes in the oven forever... like 90 minutes.  I was really worried the crust would get fried from baking that long but it is totally covered by the cream so it was well insulated and didn't burn one bit.


The verdict?  Meh.  It was fine, but really just fine.

It definitely baked and sliced nicely which was good.  However, the custard was a little flavorless as were the nectarines.  Maybe apricots would have tasted better but that wouldn't have changed the custard.

Because this was called a flan tart, I expected it to have the soft caramel on top but there was no caramel.

CA didn't care for this too much either.  Let's just say that we didn't eat the leftovers and I took it to work and no one else ate it either.

It's too bad because now I have 14 nectarines and no yummy tart to put them in.  Maybe I'll make a crisp... I love a good crisp.

Julie


Tuesday, July 9, 2013

Gluten Free Pie Crust

No gluten free people actually ate this pie crust.  In fact, I think I'm the only person who ate this pie crust.  You may be surprised, but I'll tell you a secret... this is not the first time I made something and then ate it all by myself.


I made this pie crust to serve at my book club gathering with the lemon meringue pie dip you finally get to hear about tomorrow.  Unfortunately, my GFF (Gluten Free Friend) had a last minute work emergency and was not able to join us for book club so everyone ate the dip with the regular pie crust I told you about yesterday.... Not that we all couldn't have eaten this version.  It was very tasty and I doubt anyone would have noticed the missing gluten if I hadn't told them.

This crust did taste different than my regular pie crust but I think that had more to do with the lemon juice that's in it than the gluten free flour.  However, the lemon flavor went just perfectly with the lemon flavor of the dip.

The texture of the crust was great - it held up really well for dipping and it was light and crispy.  I've heard that a lot of gluten free pie crusts tend to be super crumbly and fall apart, but I didn't find that to be the case with this recipe.  I think it might have to do with the addition of the fruit pectin or Instant ClearJel (which BTW is not packed in GF facility so may have trace amounts for those of you who are super gluten free).  I think this ingredient helps the crust stick together - fruit pectin is used to make jelly so its "jelling" quality is useful.

So, even though this recipe has not been GFF approved, I still think it's a good one.  I'm sure I'll make her a pie again eventually and will get her seal of approval (or not).


Gluten Free Pie Crust

Adapted from King Arthur Flour
Makes enough for a single pie crust

Ingredients
1 1/4 cups Gluten Free All Purpose Flour
2 T Sugar
2 tsp Fruit Pectin (or Instant ClearJel, optional)
1/2 tsp Xanthan Gum
1/2 tsp Salt
6 T cold Butter
1 Egg
2 tsp Lemon Juice or Vinegar
1 T Cold Water


Instructions

Whisk together the flour or flour blend, sugar, fruit pectin, xanthan gum, and salt.

Cut the cold butter into pats, then work the pats into the flour mixture till it's crumbly, with some larger, pea-sized chunks of butter remaining.

Whisk the egg, lemon juice and water together till very foamy.  Mix into the dry ingredients.  Stir until the mixture holds together (if it still looks to try to stick together you can add more water, 1 tsp at a time).

Shape into a ball, cover in plastic wrap and chill for an hour, or up to overnight.

Roll out on a piece of plastic wrap or a surface that has been floured with gluten free flour. Fill and bake as your pie recipe directs. 

Enjoy!
Julie