Monday, September 30, 2013

Pastrami Pizza on Rye

Shockingly when I bought the pastrami for our pastrami sandwiches on rye I bought way too much pastrami.  For some reason I thought that each of us needed a quarter pound of pastrami on our sandwiches.  Considering that we each eat quarter pound hamburgers I thought this made total sense.  It did not.  I had a lot of pastrami leftover.


I have to give CA full credit for thinking up this pizza.  He's the one who said, out of the blue, that we should use it to make pastrami pizza.

Most of the recipes I found for pastrami pizza just put pastrami on top of regular pizza.  That's boring.

I wanted the pizza to be more reminiscent of a pastrami sandwich which, of course, has rye bread.  Therefore, rye crust was necessary to make this a true pastrami pizza.

I learned my lesson from the rye bread I made a few days ago and put a few caraway seeds in the dough.  I wanted to make sure it had that real rye flavor.

This recipe makes a pretty big pizza - the dough covered an entire cookie sheet and I definitely could have rolled it out a little bit thinner.

I wanted to keep the pizza pretty simple so that the flavor of the crust and the pastrami were the stars.  So, I used a really simple marinara sauce that I made. (Jarred sauce is totally acceptable here - just keep it a fairly neutral flavor)

1 T Olive Oil
1/4 cup chopped Onion
3 cloves Garlic, minced
28 oz can Whole Tomatoes, crushed
6 oz. Tomato Paste
1/2 tsp Salt
1/4 tsp Pepper
1 tsp Sugar

Cook the onion in the oil until soft (about 4 minutes.  Add the garlic and cook one more minute.  Add all the rest of the ingredients and cook on low for 20 minutes. (You'll only need 1/2 of this for the pizza).


In addition to the marinara, this gets topped with pastrami (obviously), fresh mozzarella and Parmesan cheese.  That's it.
This pizza was pretty great.  The crust was nice and crispy and had a great, distinctive rye flavor.  The toppings were perfect - just enough pastrami flavor and not too many other distractions.

CA liked it too and has been eating it for lunch.  He says it heats up well in the microwave too.

I definitely think we'll make this again.  This time, I'll buy the extra pastrami on purpose.


Pastrami Pizza on Rye
crust adapted from Burp! Recipes
 
Ingredients
1 1/2 cup lukewarm Water
4 1/2 tsp Yeast
2 cups Rye Flour
1 cup Whole Wheat Flour
1 cup Bread Flour
1 T vital Wheat Gluten
1 1/2 tsp Salt
2 tsp Demerara or Brown Sugar
3 T Olive Oil, plus more for the bowl
1 T Caraway Seeds

1 cup Marinara or Pizza Sauce
8 oz fresh Mozzarella, sliced
1/4 cup grated Parmesan
1/2 lb Pastrami

Instructions
Add the water to a small bowl and sprinkle it with the yeast.  Allow that to sit for five minutes, until bubbly.

In the bowl of a stand mixer combine the flours, wheat gluten, salt and sugar.  Add the yeast mixture and 3 T of olive oil.  Mix with the dough hook on low speed for 9 minutes.  Add the caraway seed and mix on low speed for 1 more minute.

Oil a deep bowl and add the dough to it.  Cover loosely and let it rise for 1 hour.

Preheat the grill or the oven to 400 degrees.  Roll or press out the dough into your desired shape (I did a rectangle the size of a cookie sheet).  Grill for 2-3 minutes on each side or bake for 20 minutes until the dough is set.

Spread the sauce on top of the dough.  Top with the pastrami and cheeses.  Bake at 375 degrees or grill over indirect heat for another 20 minutes until the cheese is melted and the top is slightly brown.

Enjoy!
Julie

Friday, September 27, 2013

Asparagus and Mushroom Pasta

We don't eat a lot of pasta.  On weeknights we try not to eat a ton of carbs so I've probably had this half empty box of pasta in my pantry for a few months.  We DO eat a lot of vegetables during the week - sometimes an insane amount of vegetables.  And by we, I mean me.  I've been known to eat an entire family sized bag of frozen veggies with dinner.  CA never thinks we're going to finish it all but I usually do.


When I looked in the fridge on this particular night and saw that the only vegetables I had were asparagus, mushrooms and tomatoes they pretty much demanded to be made into a pasta dish.  Food can sometimes talk to you.

This dish came together pretty darn easily - saute up a bunch of veggies, add pasta, some herbs, a little wine and a bit of cheese.  Done.


It was a nice change up to eat a little pasta, but I still snuck in a LOT of veggies too.  There are as many vegetables in this as there is pasta so it's still nice and healthy for a weeknight meal.


Asparagus and Mushroom Pasta
Adapted from Cooking Light

Ingredients
1 T Butter or Olive Oil
1/2 cup finely chopped Red Onion
3 cloves Garlic, minced
8 oz Portabello Mushrooms, roughly chopped
1/2 cup coarsely chopped Tomatoes or halved Cherry Tomatoes
1/2 tsp Salt
1/4 tsp Pepper
1 tsp Italian Seasoning (or some combination of parsley, basil and oregano)
8 oz. Pasta
1 bunch Asparagus, cut into 1" pieces
1/2 cup White Wine
1/4 cup grated Parmesan Cheese + more for serving

Instructions
Heat butter or oil in a large non-stick skillet over medium heat.  Add the onions and cook until soft, about 3 minutes.  Add the garlic and cook until fragrant, about 1 minute.  Add the mushrooms,  tomatoes, salt, pepper and seasonings and cook until soft, about 5 minutes.  Keep warm.

Cook the pasta in a large pot of salted water for 2 minutes less than the package directions.  Add the asparagus and cook for 2 minutes.  Drain the pasta/asparagus mixture, reserving 1/2 cup of the cooking liquid.

Add the pasta, asparagus and pasta water to the skillet and cook until the liquid is absorbed, about 3 minutes.  Add the cheese and stir until just melted.  Serve with an extra sprinkling of Parmesan cheese on top.

Thursday, September 26, 2013

Baking Bouchon - Recipe 52: Fuhgeddaboutits

Thomas Keller provided me with zero explanation at to why these treats are called Fuhgeddaboutits.  I see no connection to Donnie Brasco.  I didn't see the movie but I'm pretty sure it was not about Rice Krispie Treats.  If you did see the movie and these are prominently featured, please correct me.


I've made a lot of Rice Krispie Treats... the Nutella and Oreo versions have been featured in my little corner of the Interweb.  I've also covered them in chocolate (see Nutella) but I have not put a layer of caramel in them.

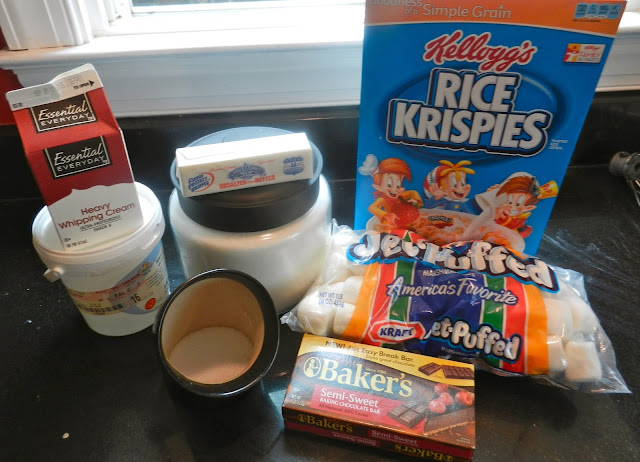
This recipe starts out with your standard Rice Krispie treat mix - butter and marshmallows are melted, krispies are mixed in and then that gets pressed into a thin layer on a sheet pan.  Once the treats have hardened, they are cut into circles.  Easy.

Next comes the caramel layer.  I neglected to take photos of this process, however we've seen it here before when I made Caramel Jam for the Caramel Nut Tart in this cookbook.  It's pretty awesome stuff and I didn't even burn it this time (maybe because I wasn't busy taking photos)!  The warm caramel is put into a mold (in my case a muffin tin - the recipe wants you to use silicone molds but I don't have them.  I was worried the caramel would stick to the muffin tin but I sprayed it with non-stick spray as a precaution and it came out just fine) and the cut Rice Krispie treats get layered on top of the caramel.


After the caramel has a chance to harden, the whole shebang gets covered in chocolate and sprinkled with a little salt.

The cookbook has a trick for covering stuff in chocolate that I really liked - you take a pastry brush and brush chocolate on what will be the bottom side of your treat and let that dry.  Then when you use a fork to dip the rest of the treat in chocolate you don't have to worry about the bottoms not getting completely covered because of fork interference.  Genius.


My house was ridiculously humid the day I made these so the chocolate refused to harden after hours of sitting out.  I ended up putting them in the fridge to help them along which worked OK except that it also "helped" harden the caramel.  Therefore, I practically broke my freakin' tooth when I bit into one.  I also think I overcooked the caramel just a little bit so it was harder that it ideally should have been even without the excessive refrigeration.

All in all these are pretty awesome!  The cookbook suggests that you can make this same recipe much faster and more simply by using store bought caramels and melting one inside each mold instead of making your own caramel which is really smart and I think if I make these again I'll do it that way to avoid the possibility of losing a filling.

Enjoy!
Julie

Wednesday, September 25, 2013

Baking Bouchon - Recipe 51: Rye Bread

I still have bread in my freezer from when I made multigrain bread last week but I need to do some catch up on these bread recipes so it's time to make some rye bread.


I have zero experience in making rye bread and it turns out it just means you replace some of the white flour with rye flour which is easy.  According to Thomas Keller in order for a bread to be called rye bread it must be at least 50% rye flour - this one's about 60%.  I'm pretty sure these rules aren't as serious as the 51% corn rule for bourbon but I'll take his word for it.

The dough came together easily, I kneaded it with the dough hook of my mixer for 30 minutes, (which by the way makes my mixer get really hot - if it dies I think I'll cry... and then I'll buy a new one that's orange) the dough rested, it proofed, it got scored and it got baked.


The bread turned out pretty well.  The crust was crusty and the insides were not as light as I would have preferred but not bad in comparison to some other breads I've made.

My biggest issue was that it didn't taste very rye-like to me.  TK does not put caraway seeds in his rye bread because he says that he likes the true "rye" flavor to come through.

I apparently am used to caraway seeds in my rye bread and so I'm trained that caraway flavor = rye flavor.

CA felt the same way - he wanted the caraway seeds.


CA got really excited when I told him I was making rye bread.  His excitement waned slightly when I told him it wasn't a marble rye.  The man watches too much Seinfeld.

His happiness had nothing to do with the bread itself - it had to do with what he wanted to do with the bread.  As in use it as a vehicle to eat pastrami which he specifically requested I pick up at the store... along with real mustard with seeds in it that originated in a European country, and little pickles, not the sweet gherkins I buy for myself but dill ones.  It was no DGS Deli Pastrami Sandwich but it was a good use of the bread.


Enjoy!
Julie

Tuesday, September 24, 2013

Baking Bouchon - Recipe 51: Coffee Cakes

I'm pretty much sold on making the recipes in this cookbook in miniature.  These were supposed to be made into six 6" cakes, but I don't know anyone (other than me) who likes to randomly eat a six inch cake all by themselves.  Therefore, I opted for 12 muffin sized cakes.  Much better for sharing.


There are three components to these coffee cakes.

1.  Cake: the cake is similar to a pound cake but is lightened with creme fraiche or sour cream.  I opted for sour cream because I already had it on hand and only one of my four regular grocery stores carries it.  I wasn't going to that one on this particular day so sour cream wins.

2.  Topping: a mixture of brown sugar and cocoa powder.  I thought the cocoa powder was a weird addition (CA was totally against it) but you can't really taste it in the final produce (unless you're CA who says he can definitely taste it but that it's wasn't too bad).

3.  Almond Streusel Topping: a combination of butter, almond flour, regular flour, sugar and salt.  Just like I used on the blueberry muffins.  It's good stuff!
These get assembled in the following order... cake batter, topping, more cake batter and then almond streusel topping.  Technically, I was also supposed to dust them with more powdered sugar, cocoa powder and ground cinnamon, but I totally forgot.  Oops.

The second oops of the day came when my muffins stuck to the pan. 

I really should learn to just put paper liners in my muffin tins before baking things.  It really would help me to avoid having hideously broken muffins at the end of the day.  However, I kind of hate paper muffin liners.  I'm convinced that I lose part of my muffin in that paper.  All that stuff that sticks to the paper is wasted - I can't eat it all, even when I scrape the paper with my teeth.  If don't have the paper, I get the whole muffin... even those last 2 grams of crumbs.  I want all the muffin I can get.


Regardless of a little stickage, these coffee cakes turned out really well.  They're great for breakfast because they're not too sweet.  The cake part stayed really moist when it baked and it has streusel on it which I'm a big fan of.  I definitely ate two of them... maybe I should have just made them the normal size.

Enjoy!
Julie

Monday, September 23, 2013

Baking Bouchon - Recipe 50: Pear Feuillette

Some days when I'm baking out of this cookbook I feel like I am in French class.  Feuillette is French for puffy pastry... so basically these are pear turnovers.


I didn't have any puff pastry frozen so I had to make it again.  I went ahead and made a couple of batches so that I have enough for the rest of the puff pastry recipes in the cookbook.

Making the pastry takes much longer than making the desserts themselves.  It's really a three day process of refrigerating and rolling and refrigerating some more.  I'm glad I don't have to make it again although I took a sneak peak at the croissant recipes that follow and it looks like a pretty similar process so I'm in for a lot more rolling and refrigerating.

The pears in this dessert are poached in white wine - which is awesome.  I was actually really surprised by the poaching process because I was under the impression that in order to poach something the liquid needed to be hot.  This is not.  Wine, water and sugar are heated together to melt the sugar, then lemon juice it added and the mixture is cooled.  After it's cooled it gets combined with the pears.  Isn't that wrong?  I'm not aware of the technical definition of poaching but this doesn't sound like it.  This just sounds like soaking. 
The other component of this dessert is almond cream which is a combination of almond flour, regular flour, butter, powdered sugar and eggs.

To assemble these little guys you place a dollop of almond cream on top of the puff pastry, top that with some poached pears and then another layer of pastry.

Full disclosure that these are supposed to be in the shape of pears and they're supposed to have a beautiful lattice shape on top.  I was unable to do either because I didn't have a pear shaped cutter or a lattice cutter.  I attempted to freehand the lattice but the holes ended up being too big.  So I changed course and used a straw to cut little holes in the lids.  That ended up working pretty well even if they look like turtles.

The pastries get topped with some egg wash to encourage browning and we're ready to bake.


I get super nervous every time I bake my own puff pastry.  I'm convinced that it won't "puff" but it usually does despite my worrying.

These were super tasty.  Surprisingly, you really can taste the wine in the poached pear.  Plus, puff pastry tastes like butter... so there's that.  The almond cream is actually a really important component because it keeps the whole thing moist.

CA liked them too - I think he ate more of them than I did.  That's usually a good sign.


Enjoy!
Julie

Friday, September 20, 2013

Peanut Butter Cheesecake Brownies

This recipe comes to you courtesy of the random crap in my pantry.


I somehow ended up with a bunch of random chocolate, some cream cheese and an unnecessary amount of creamy peanut butter in my cupboard.  We don't eat creamy peanut butter in my house - both CA and I are crunchy people - so the only thing to do with creamy PB is to bake with it. 

I was really craving brownies and peanut butter cheesecake sounded pretty good too so I thought I'd swirl the two together.

I looked through my cookbooks and found a couple of recipes for peanut butter brownies and a couple more for cheesecake brownies but none for the combo so I made my own combo... and it actually worked!
The brownies are pretty basic - butter, chocolate, sugar, eggs, vanilla, flour and chocolate chips (because you need more chocolate).  It's all made in one pot too which makes clean up a lot easier.

There's nothing crazy about the cheesecake party either - it's got exactly what you'd expect peanut butter cheesecake to have in it - cream cheese, peanut butter, powdered sugar, regular sugar, vanilla, eggs and salt.  I didn't really have a PB cheesecake recipe so follow so I used a regular cheesecake recipe and subbed some of the cream cheese for peanut butter... and then crossed my fingers

Those two get swirled together in a pan and baked up.

I had my doubts because not everything I randomly make up works out so well.  For example, the first batch of pretzel, PB, marshmallow brownies.

These turned out pretty well... not perfect, but good.  They were super rich which is what I liked about them.  Make sure to cut them into small pieces or you'll die in a rich, brownie induced coma.  The cheesecake part wasn't amazing but I still liked it.  CA said they tasted too eggy which I don't really agree with.  My coworkers really liked them.

Peanut Butter Cheesecake Brownies

Ingredients

For the Brownies
3/4 cup Butter
4 oz. Unsweetened Chocolate
2 cups Sugar
3 Eggs
1 tsp Vanilla Extract
1 cup Flour
1/2 cup Chocolate Chips

For the PB Cheesecake
8 oz. Cream Cheese, softened
1/2 cup Peanut Butter
1/4 cup Powdered Sugar
1/4 cup Sugar
1 tsp Vanilla Extract
2 Eggs
1/8 tsp Salt

Instructions
Preheat the oven to 350 degrees.  Line a 13x9 inch pan with aluminum foil and spray the foil with non-stick spray.

In a medium saucepan, melt the butter and chocolate together.  Remove the pan from the heat and stir in the sugar.  Add the eggs and vanilla and stir until thoroughly incorporated.  Add the flour and stir until incorporated.  Finally stir in the chocolate chips.

In the bowl of a stand mixer fitted with the paddle attachment mix together the cream cheese and peanut butter until uniformly mixed.  Add both sugars and mix on medium speed until fluffy, about 3 minutes.  Add the vanilla, eggs and salt and mix until just combined.

Add half the brownie batter to the pan and spread it evenly with an offset spatula.  Dollop half of the cheesecake mixture on top.  Dollop the remaining brownie batter on top of them, followed by the remaining cheesecake mixture.  Use a knife to swirl the two batters together.

Bake for 30-35 minutes until just set.  Cool completely before cutting into squares (They actually taste really good straight out of the refrigerator).

Enjoy!
Julie

Thursday, September 19, 2013

Baking Bouchon - Recipe 49: Lemon Caramels

The name of these is very deceiving - they're actually not caramels at all.  They look like caramels and have the texture of caramels but they're really lemon and caramel flavored chocolate.


Have we talked about Carmelia chocolate before?  We probably have but it's worth repeating that this is probably the best tasting chocolate I've ever had.  It's caramel flavored and so ridiculously creamy.  I have to hide it from myself to stop from eating it.... I kind of succeeded this time.

To make these "caramels" you combine melted carmelia and white chocolate together with cocoa butter (which is totally disgusting, by the way -- when it's melted it's like oil but way grosser).   All of that gets put into the food processor.  Then you cook sugar, butter and lemon juice together and stream that into the chocolate mixture while the food processor is running.
And then it leaks out all over the counter... because it's liquid and it manages to get under the blade in the food processor and run out from underneath the bowl.  It's great.

After that you briefly spin in some lemon zest to pump up the lemon flavor.


The recipe wants you to use confectionary rulers to shape the caramels... or a 6 inch square baking pan... neither of which I have.  I put mine in a loaf pan and it worked just fine.

It took a long time for these to set up and once they did there was a weird film on them.  I've deduced that it's the cocoa butter because it's the grossest thing in these caramels.


However, once I scraped off the film, the caramels were super pretty and shiny.  They were nice and firm (unless the first set of caramels I made) and held their shape nicely after I cut them into squares. 

I liked these - the caramel/lemon flavor combination is really unique.  CA was not a fan.  He said they were weird.  He took them to work and also got mixed feedback... good and weird.

Will I make them again?  Probably not.


Enjoy!
Julie

Wednesday, September 18, 2013

Baking Bouchon - Recipe 48: Multigrain Bread

I'm way behind on the bread recipes in this cookbook.  I've made 5 so far, but I still have 9 left... rye, sourdough, pain palladin, pain rustique, whole wheat-pecan, vegetable baguettes, nanterre and pain-au-lait and dutch crunch baguettes.  That's a lot of bread, especially considering I only have one recipe left in the pate a choux chapter (cheese puffs, which I'm pretty pumped about but I feel weird finishing a chapter when there are 9 breads still to bake).


I suspect I haven't made as much bread because I'm not sure what to do with all of it.  CA and I don't eat much bread and it's weird to bring a loaf of bread to work to share.  I feel like my coworkers would think I was a total weirdo if I showed up and sent out an email to tell them there was multigrain bread in the food cube.
The recipes in the book usually make two loaves so we usually eat one (or part of one before it gets moldy) and freeze the other one.  I currently have two loaves of bread sitting in my freezer with no immediate plans to use them.  We just can't seem to eat enough bread.

Enough about bread in general, now to this bread.

This is my favorite bread so far and it has everything to do with all the variety of flours and grains in it.

This bread not only has regular, whole wheat and rye flour in it, it also has oats, sesame seeds, sunflower seeds, flax seeds and quinoa in it.  While I'm keenly aware that bread with whole grains is healthier for me, the reason I eat more whole grain bread than white bread is because I think it tastes better.
I'm not kidding.  I actually like the nuttier, grittier flavor of whole grain bread to white bread.  Not that I'd turn down a beautiful warm baguette with a big slab of butter on it - but if you put that in front of me next to a slice of bread with all kinds of seeds and nuts and stuff in it I'd pick the seedy bread every time... provided it also came with butter.

Making this bread requires that you soak all the seeds and nuts for an hour (so that they're not rock hard) and then add them to the dough after it is kneaded.  Apparently you add the "soaker" after kneading so that it doesn't interfere with the development of gluten in the dough which would result in a flatter, denser bread. 

I should rewrite that last sentence to read that you should add the soaker after kneading because of science.


This bread is definitely my favorite so far in the book.  However, there are so many more breads left that I have no idea if it will hold that record when I'm done with this chapter.  Especially since I have no idea what most of the remaining breads even are... pain palladin, pain rustique, pain-au-lait... it sounds like a big pain.

I know that was nerdy.


Enjoy!
Julie