Tuesday, June 18, 2013

Balsamic Strawberry Shortcake

You can hardly beat strawberry shortcake for a delicious summer dessert.  It's truly a classic.  Fortunately, I'm not very good at leaving well enough alone.


The best thing about this particular strawberry shortcake is the balsamic vinegar that the strawberries are macerated in.  I know it sounds a little strange, but I promise you it is not.  Years ago I had a strawberry daiquiri that had balsamic vinegar in it and I still think about it.  There's something about the balsamic that just adds a touch of spice.  When you're eating it, you think to yourself "this is different, good different, and I'm not sure why".


I am fully aware that there is fierce debate out there about what the base of strawberry shortcake should consist of.  There are those firmly in the angel food cake camp and those staunchly in the biscuit camp.  I do love angel food cake, but for this particular application, I am convinced that the biscuit is the way to go.  Why?  Because the focus of this baby is the sweet, strawberry, balsamicy syrup that comes off the berries and soaks into the base.  I really think that the syrup would just overwhelm a delicate angel food cake.  You need the dense biscuit to soak up all that tangy goodness.  Plus, the cake would be too sweet.  Trust me.

Please prepare yourself for my biscuit rant....

The worst possible thing you can do to a biscuit is touch it.  Don't stir it, don't beat it, don't even look at it... OK, that's impossible but I'm completely serious when I tell you that the less you mess with a biscuit, the better it is.  I am adamant when making biscuit dough you should stir it as little as possible.  When you're done stirring it you should think that you need to stir it more.  It should be shaggy and have dry spots... on purpose.  You also shouldn't use a rolling pin on it.  Just don't.  Pat the dough out and fold it.  Then pat it and fold it a few more times.  That's how you get a flaky biscuit that you can pull apart and put butter on (or in this case whipped cream and strawberries).  If you mess with the biscuit dough too much you just end up with a hockey puck

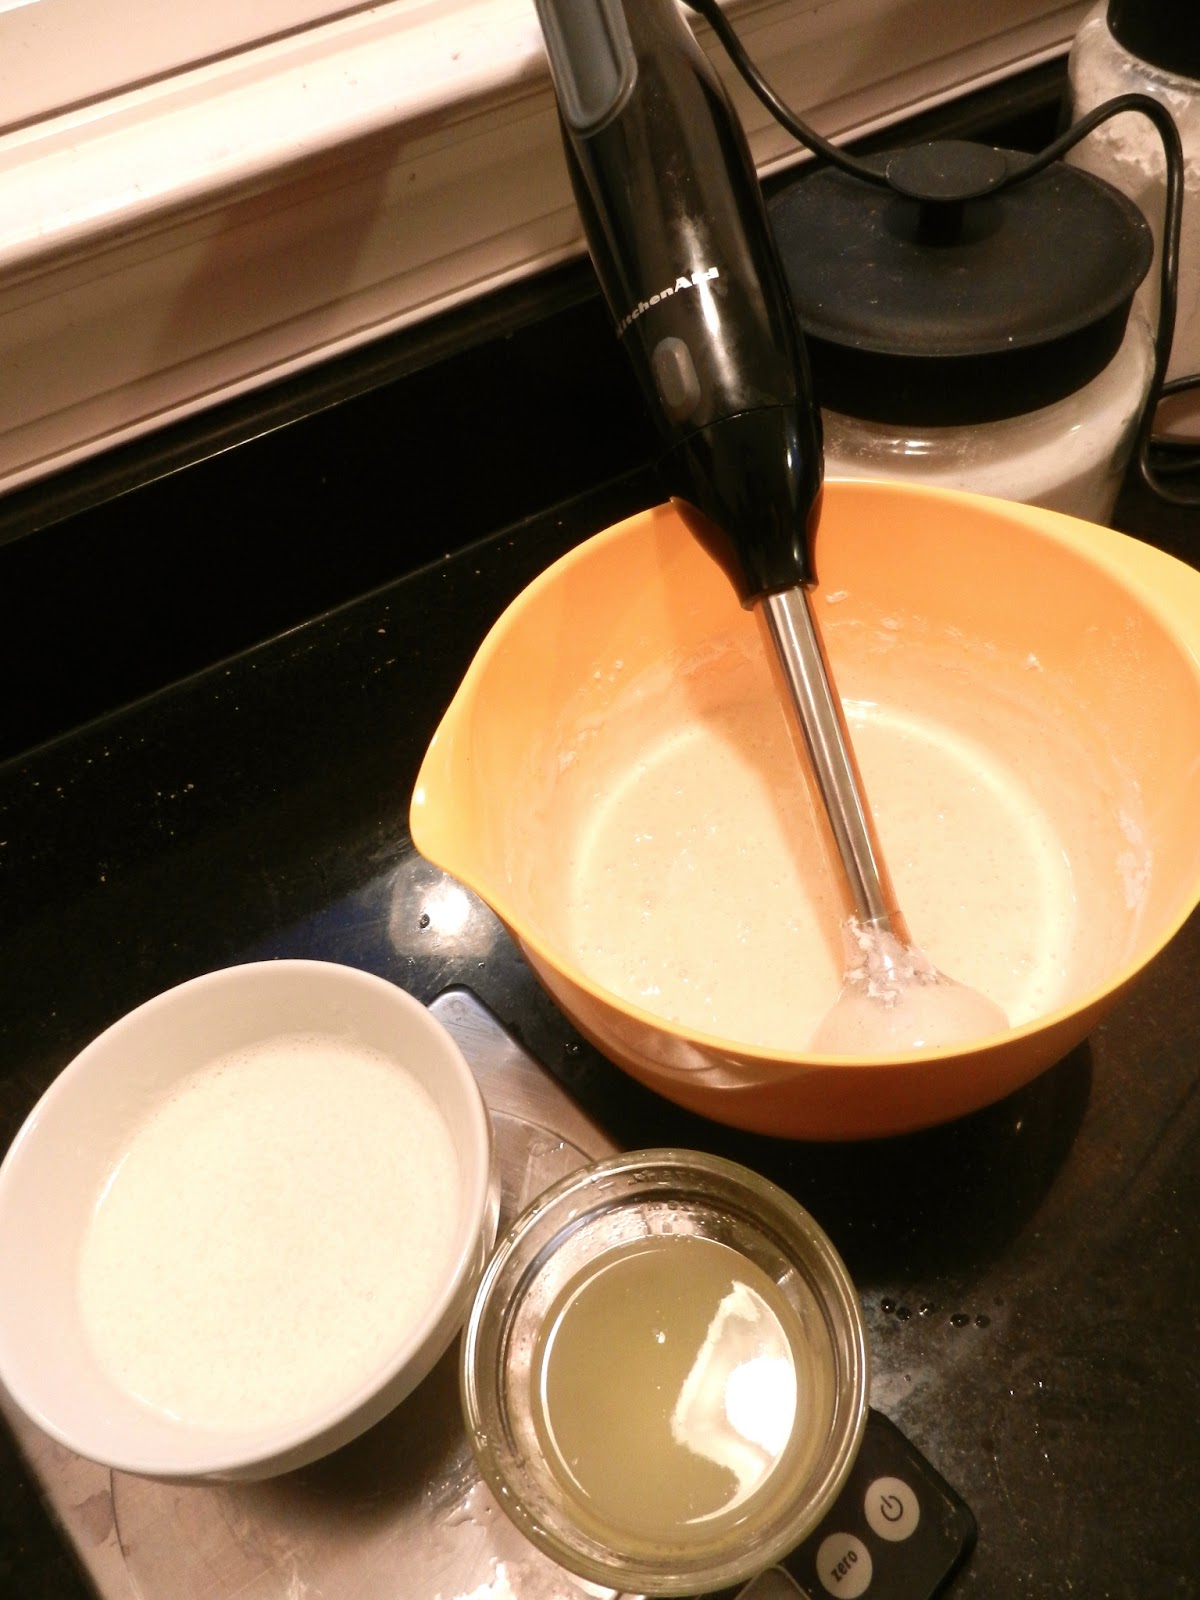
I'm also a big advocate of fresh whipped cream.  I don't understand why people think whipped cream is so hard.  It's 2 ingredients... cream and sugar... then you whip it.  There's nothing hard about it.  I guess you could buy that stuff in the can that makes a funny noise when you dispense it.  I agree that it's pretty fun to squirt it directly into your mouth but homemade whipped cream tastes so much better.

Of course, that doesn't stop me from eating frozen cool whip out of the container with a spoon but that's another topic all together.

CA recently bought us one of those cream charger things that uses N2O cartridges to make whipped cream but I haven't used it yet.  I should use it because it would give me the taste benefits of fresh whipped cream and the fun benefits of squirting it into my mouth.  CA has used it with the CO2 chargers to make foams for some of his crazy cocktails but to tell you the truth the thing scares me.  I'm 100% sure that N2O has to do with science and science and I are not friends.  It scares me.  I think it's going to explode if I do something wrong and then I'll be dead and that would be bad.


So, we've got strawberries, biscuits and whipped cream.  Yep, that's all we need.

These are the perfect summer dessert and I promise you that you will love the balsamic.  It really elevates the dessert and makes it feel and taste so much more special.


Balsamic Strawberry Shortcake
6 servings

Ingredients
16 oz. Strawberries, hulled and sliced
1 T Sugar
2 T Balsamic Vinegar

1/2 cup All Purpose Flour
1/2 cup Cake Flour
1 1/2 T Sugar
1 tsp Cream of Tartar
1/2 tsp Baking Soda
1/2 tsp Baking Powder
1/4 tsp Salt
2 T Shortening
1 T cold Butter
1/3 cup Buttermilk

1 pint Heavy Cream
2 T Sugar

Instructions
Combine the strawberries, 1 T of sugar and the balsamic vinegar in a small bowl.  Refrigerate for at least 1 hour but not more than 3 hours.

Preheat the oven to 400 degrees.  Spray a baking sheet with non-stick cooking spray.

In a medium bowl, stir together the flours, sugar, cream of tartar, soda, powder and salt.   Cut in the shortening and butter until the mixture resembles course crumbs.  Add the buttermilk and stir with a wooden spoon until the dough just comes together.

Turn the dough out onto a floured surface.  Pat it into a round and fold it in half.  Repeat patting and folding 7 times.  Pat the dough to 1/2" thickness and cut into six 2 1/2" - 3" rounds.  Put each round on the prepared pan and bake for 12-13 minutes or until light golden brown.  Allow the biscuits to cool completely.

Add the heavy cream and 2 T of sugar in the bowl of a stand mixer fitted with the whisk attachment.  Whip on medium-high speed until the mixture holds stiff peaks.

Split each biscuit in half.  Set aside the biscuit tops.  Divide the whipped cream evenly among the 6 biscuit bottoms.  Top each with 1/6 of the berries.  Spoon leftover berry liquid evenly on top of each shortcake.  Place the tops of the biscuits on top of the berries.


Enjoy!
Julie

Monday, June 17, 2013

Fudgey Pretzel, Peanut Butter, Marshmallow Brownies

I told you on Friday I was going to figure out how to make these brownies match the picture in my head.  Well, I'm stubborn and I did it.  Yeah for me, pat on the back, happy dance, etc., etc.


Actually, it's yeah for you because you can make these too and they're stinkin' delicious.  I love a fudgy brownie and these are perfectly fudgy (BTW, I've gone back and forth 65 times between spelling that fudgy and fudgey.  Neither is a real word and the internet is not helping me because apparently no one else can figure it out and people use both.  This is the stuff that I worry about).  In fact, when I eat a brownie, I want to wonder if it was cooked all the way.  It should be reminiscent of batter but cooked enough so that it doesn't actually drip between your fingers when you try and eat it.  Dry brownies are the worst... baking brownies too long makes them dry... therefore over-baked brownies are completely unacceptable.  Don't do it.
Not only are these brownies fudgy, they also have that salty/sweet taste that I adore.

My first attempt at these brownies, I needed to use up leftover peanut butter mousse which was a combination of peanut butter & marshmallow fluff.  Since I already used up the mousse, I didn't feel limited to using it in its combo form and decided to leave the marshmallows and peanut butter separate which I liked (I swear I wasn't being lazy, I really did want it this way).  The distinct flavors helped the saltiness of the peanut butter come through (even if I did add some honey to it).  I also like that the marshmallows puffed up and browned during the baking process which made the swirls super pretty.

If I had one complaint about these it's that I wanted the pretzels to stay crunchier but that's probably not a realistic possibility considering they're doused in batter and I like that they were integrated into the brownie instead of everything being piled on top.  To remedy that, you could sprinkle more crushed pretzels on top if you care that much... I don't.
I love these and am very happy with how they turned out.  CA thought they were just OK.  In fact, he said they might be too peanut buttery.  He's weird and wrong.

These do make me wonder about something though... peanut butter s'mores.  Has anyone tried this?  I'm thinking it would be a great idea to smear PB on one of the graham crackers before smushing the toasted marshmallow in the middle.  Hmmm, I may need to try that this summer.


Fudgey Pretzel, Peanut Butter & Marshmallow Brownies
Brownie based adapted from Brownies to Die For

Ingredients
4 oz. Unsweetened Chocolate
2/3 cup Butter
2 cups Sugar
4 Eggs. lightly beaten
1 tsp Vanilla Extract
1 1/4 cups All Purpose Flour
1 tsp baking Powder
1 tsp Salt

3 cups coarsely crushed Pretzels
1 cup Creamy Peanut Butter
2 T Honey
1 cup Marshmallow Fluff
1/2 cup Salted Peanuts, coarsely chopped

Instructions
Preheat oven to 350 degrees.  Spray a 9x13 pan with non-stick cooking spray.

Melt the chocolate and butter in a medium saucepan.  Remove from the heat and mix in the sugar, eggs and vanilla.  Once combined, add the flour, baking powder and salt and mix until combined.

In a separate bowl, combine the peanut butter and honey.  Mixing with a spoon until evenly combined.

Sprinkle the crushed pretzels in the bottom of the prepared baking pan.  Pour the brownie batter on top.  Dollop the peanut butter mixture and the marshmallow fluff on top of the brownie batter and swirl with a knife.  Sprinkle the top with the chopped peanuts.

Bake for 25 minutes until the swirls are golden brown and the brownies are set.  Cool completely before cutting.

Enjoy!
Julie

Friday, June 14, 2013

Pretzel, Peanut Butter & Marshmallow Brownies

These brownies really should have tasted better.  In my head they were amazing.  Seriously, amazing.  I mean, how could brownies, pretzels, peanut butter and marshmallows not be good?


Don't get me wrong... these were not bad.  I ate them.  CA ate them.  I took them to work.  My co-workers ate them.  CA took them to work.  His co-workers ate them.  We both got compliments, but I still didn't love them.  I wanted them to be different...

I blame it on the brownie recipe.  Scratch that, I blame it on my laziness.  Don't pretend like you're shocked.  Sometimes I'm lazy.

The whole idea concept of these brownies came together because I'm still trying to get rid of leftover ingredients.  The first thing I had leftover was peanut butter marshmallow mousse that I used to fill a bunch of strawberry cupcakes.  I also had a bunch of pretzels from making Peanut Butter Pretzel Balls.  There was also a can of cocktail peanuts hanging around but I can't remember why.

I'm not sure how brownies popped in my head while staring at all this random stuff, but it did.  I started scanning through all my brownie recipes to see what I could make without going to the grocery store (because going to the grocery store would entirely defeat the purpose of having LESS stuff in my pantry).   Luckily, a long time ago, my sister gave me a cookbook called Brownies to Die For which has a tons of different brownie recipes in it.  I really love this cookbook.  There are so many different recipes in it that I can make brownies at any given moment.  There are brownies that use unsweetened chocolate, cocoa powder, semi-sweet chocolate, bitter chocolate, even no chocolate at all (blondies... one of my absolute favs!) There are brownies with eggs and without eggs, with milk and without milk.  It's basically a magical cookbook that means I can have brownies without going to the grocery store.  So I flipped and flipped and flipped until I found a recipe that did not require me to get in my car.  BONUS - the recipe not only didn't require shopping, it also had buttermilk in it which I happened to have in my fridge that was about to expire.   I thought I'd won the lazy, don't leave my house lottery.


I feel like I'm being a mean girl about these brownies and they don't deserve it.  In fact, if you like cake brownies, you will love these.  I, however, was envisioning fudgey brownies and that's not what I got.  They just didn't match the picture in my head.

Even though I'm talking smack about these guys, I still want to give you the recipe.  Why?  Because you might love them.  You might think that they're totally amazing... like PB Pretzel cake.  Huh.... maybe if I'd called these PB Pretzel Cake I wouldn't be so disappointed.

For all you cake brownies fans, you should definitely make these.  For you fudgey fans (like me) stay tuned.  I'm not giving up on this concept and am going to take another run at it.  Maybe tomorrow.


Pretzel, Peanut Butter & Marshmallow Brownies aka PB Pretzel Cake
Brownie based adapted from Brownies to Die For

Ingredients
1/2 cup Butter
1 cup Boiling Water
2 cups All Purpose Flour
2 cups Sugar
1/4 cup Cocoa Powder
1 tsp Baking Soda
1/2 cup Buttermilk

2 Eggs, slightly beaten

3 T Butter, softened
1 cup Creamy Peanut Butter
1 cup Marshmallow Fluff

3 cups coarsely crushed Pretzels
1/2 cup coarsely chopped Salted Peanuts

Instructions
Preheat oven to 350 degrees.  Spray a 9x13 pan with non-stick cooking spray.

Place the 1/2 cup of butter in the bowl of an electric mixer fitted with the paddle attachment.  Pour the boiling water over the butter, let it sit for 1 minute, then stir on low speed until the butter is melted.  Add the flour, sugar, cocoa powder and baking soda.  Mix on low speed until combined.  Add the buttermilk and eggs and mix on low speed until combined.

In a separate bowl, combine the 3T butter, peanut butter and marshmallow fluff until smooth and incorporated.

Sprinkle the crushed pretzels in the bottom of the prepared baking pan.  Pour the brownie batter on top.  Dollop the peanut butter mixture on top of the brownie batter and swirl with a knife.  Sprinkle the top with the chopped peanuts.

Bake for 45 minutes until the peanut butter swirls are golden brown and the brownies are set.  Cool completely before cutting.

Enjoy!
Julie

Thursday, June 13, 2013

Oreo Rice Krispie Treats

We're still using up leftovers around here and it doesn't take a rocket scientist to figure out what to do with leftover marshmallows, Rice Krispies and Oreos.

For some reason, I decided that a recipe which required one box of Oreos meant that I should buy three boxes of Oreos.  I don't know what's wrong with me. 

I'm sure we all know what happens when there are Oreos lingering around in the pantry.  Yep, this little girl has the me pegged.

At least I found a way to get rid of one box.  There's still one left and so far I've avoided stuffing them in my face.  (I'm pretty sure that's only because that box is sealed, if it were open all bets are off).


Nothing earth shattering is happening here.  You make Rice Krispie treats and stir in chopped up Oreo cookies.  CA and I both took some of these to work and, to my amazement, people loved these things as much, if not more, than some of the super complicated things I've made.  I'm not sure if it's because people love marshmallow treats or because they love Oreos.   Both are pretty nostalgic so I can see the appeal.

I am a firm believer that marshmallow treats should be extra marshmallowey.  I always add more marshmallows than the original recipe calls for because I HATE dry, crunchy Rice Krispie treats.  They're the worst... definitely not worth the calories.  (I just got off the phone with my sister and she feels the same way, maybe it's hereditary).  These were perfectly soft... I actually think the cream filling in the cookies helped them along a little bit in that department.  The hot marshmallow melts it a little bit when it all gets mixed together.... mmmmmm.

It's actually a miracle that these treats came out exactly as soft as I wanted them to because I literally took a box of Oreo cookies, whatever leftover marshmallows and Rice Krispies I had and mixed it together.  I only measured the ingredients so I could tell you guys how much I put in there.  Sometimes things are just meant to be.

Can we talk for a second about how fun it is that when you microwave marshmallows they get all puffed up?  Am I the only one who stares in the window of the microwave to watch it?  Oh, I am....awkward.  This may be the #1 reason that I like to microwave the marshmallows when I make Rice Krispie treats instead of heating them on the stove.  The #2, 3 and 4 reasons are that it's easier, faster and has less of a chance of burning.

Oreo Rice Krispie Treats

Ingredients
6 cups mini Marshmallows
4 T Butter
6 cups Rice Krispies Cereal
5 cups Oreo Cookies, chopped (about 1 package)

Instructions
Spray a 9x13 pan with non-stick cooking spray.  Put the marshmallows and butter in a microwave safe bowl.  Microwave for 90 seconds until the marshmallows have puffed up and begin to melt.  Stir in the cereal and chopped cookies.  Dump the mixture into the prepared pan and press down evenly.  Allow the treats to cool completely.  Turn the treats onto a cutting board and slice into squares.


I might start experimenting with other mix ins for Krispie Treats.... maybe some salty stuff like pretzels and potato chips.  What do you think?

Enjoy!
Julie

Wednesday, June 12, 2013

Chocolate Frosting Cups

I'm in "use this crap up" mode.  I have a problem with judging how much food to buy.  I am totally paranoid of running out of something and having to go back to the store mid-baking.  I HATE going back to the store.  So, to avoid that possibility I usually buy way too much stuff.

To that end, I somehow ended up with excessive amounts of Oreo Cream Cheese Frosting (along with too much champagne buttercream, peanut butter mousse, frozen strawberries, pretzels, marshmallow fluff, marshmallows, Oreos, Rice Krispies, etc., etc., etc.).

Therefore, we'll be spending the next few days talking about how I got rid of it all.  The frosting was the first to go because having leftover frosting in your fridge is a terrible idea.  I somehow find myself standing in front of the fridge with a spoon not remembering how I got there or why I actually opened the door in the first place.


There was no way I was making more cake to put the leftover frosting on.  I'm totally caked out (I know, I'm as shocked as you are but it really is possible).  Therefore, I decided to make little cups to hold the frosting... kind of like edible shot glasses.


This is essentially chocolate pie crust.  I intentionally make it more bitter chocolatey than sweet chocolatey.  There's enough sugar in the frosting to put a horse in a coma so extra sweetness was not required in what is really just a vehicle for eating frosting.


At least this is a little bit more acceptable standing in a kitchen by the light of an open refrigerator with only a spoon.


Honestly, you could put all sorts of things in these cups... other frosting flavors (vanilla, cream cheese, chocolate), pudding, whipped cream.  Just think of them as a chocolate spoon.

Chocolate Frosting Cups

Ingredients
1 1/4 cups All Purpose Flour
1/4 cup Sugar
1/4 cup Cocoa Powder
1/4 tsp Salt
1/4 cup Butter, cold and cut into cubes
3T - 4T Ice Water

Instructions 
Preheat the oven to 375 degrees.  Spray a mini muffin pan with non-stick spray.

In the bowl of a stand mixer fitted with the paddle attachment, mix together the flour, sugar, cocoa powder and salt.  Add the butter and mix on low speed until crumbly.  Add ice water 1 tablespoon at a time until the dough just comes together.

Drop 1 tablespoon of batter into each of the prepared muffin cups.  Press the batter into the cup and up the sides to create a well in the center.

Bake for approximately 15 minutes or until set.  Let the cups cool completely and fill with desired filling.


Enjoy!
Julie

Tuesday, June 11, 2013

Baking Bouchon - Recipe 38: Lemon Poppy Seed Muffins

It's been a while since I cracked open the good old Bouchon book.  I've been so busy making other stuff, it's been a bit neglected.  However, my super cool parents came to stay with us for the weekend and I wanted to make something out of the cookbook for them.  My mom is the most supportive person in my life and reads my blog religiously (thanks mom!) so I absolutely had to make her something from the cookbook.


Luckily, I had everything to make these muffins in the house already so I didn't even have to go to the grocery store... Score! 

The ingredients are pretty much what you would expect for lemon poppy seed muffins... flour (cake flour which I'm a big fan of because it gives a lighter texture than all purpose flour), baking powder, salt, eggs, vanilla, butter (which I prefer to oil in muffins because it adds more flavor) lemon juice, lemon rind and poppy seeds.


When I read the instructions on this recipe I was unusually excited with the mixing method.  No whisks, electric mixers or spoons here.  This batter gets mixed up using an immersion blender.  I'm a big fan of my immersion blender!  I pretty much use it any chance I get.  I never thought to mix batter with it before but it makes total sense.  All the ingredients get pretty much emulsified together which is a good thing.  Especially since the butter is melted, the immersion blender keeps it from coagulating (that word makes me gag) and separating from rest of the batter.


The only things that don't get blended are the lemon zest and the poppy seeds which makes sense.  Immersioning poppy seeds would just make the batter weird and brown and blending up the zest would make it bitter.

The batter gets refrigerated overnight which made baking these puppies up in the AM really speedy.


Did you notice that I finally got a jumbo muffin pan?  I figured it was worth it since all the muffins in this cookbook call for it.  Plus, then I can pretend I'm eating only one muffin instead of two regular size muffins.


These beauties baked up perfectly!  They were light and fluffy and oh so lemony!  Using a combination of juice and zest makes them amazingly tart.  I actually didn't have as many poppy seeds that the recipe called for so they were less spotted than they should have been.  However, I'm not sure that poppy seeds even taste like anything so I think they're just for looks.

Mom, Dad, CA and I all enjoyed these muffins and they fueled us up for a big day of touring DC.  I'm so glad I got to share them with the parentals, they deserve the freshest, homemadiest, more delicious muffins in the world.


See how nice I am to visitors?  Now ya'll come over too so I can make you some goodies.

Enjoy!
Julie

Monday, June 10, 2013

Have a Ball (plus new & improved Cheesecake Balls)

Remember ball week?  How could you possibly forget when I tested eight kinds of balls.  I certainly haven't forgotten or, frankly, recovered from ball week.  However, all that testing came to good use last weekend at my sweet friend's wedding.  I made 400, yes 400, balls.


This is only 200 balls... imagine what 400 would have looked like.  I don't have a panoramic camera so I couldn't take a photo of all of them.  (BTW, please excuse the photo quality in this post... I took all these with my iPhone which has been through the ringer/washer).  I've never had 400 balls in my house at the same time before.  I think you have to go to Chuck E Cheese for that (where did you think I'd suggest you go?).


In case you're wondering, 400 balls is too many for a wedding of 100 people.  Apparently, not everyone is like me and takes two one of each.  Go figure.

(If you're looking for recipes - I've linked up the original posts below... with the exception of the cheesecake balls because I made some stellar improvements to those for the big day)

The white balls are Lemon-Lime Sugar Cookie balls... definitely a favorite of mine!  Since this time around was the real deal, the balls got some decorations which made them not only delicious, but pretty.  Pretty counts at weddings, obviously.  The lemon-limers got green sprinkles which not only matched the wedding accent color but the colors of limes.
The peanut butter balls are a classic and I think were a big hit.  These were decorated with a squiggle of melted peanut butter chips.  I really love how they turned out.   I just melted the chips and put them in a squeeze bottle to make the decorations.

Next up were the Nutella Rice Krispie balls.  I'm always amazed by how much people like Rice Krispie treats.  They're so easy to make and people go crazy for them.  For these, I crushed up some extra cereal and sprinkled it on top for a simple garnish.

The last ball was the Cheesecake ball... if you remember from the original post the test version of these were delicious but caused me significant anxiety when trying to roll them.  The cheesecake was too soft and I couldn't get them roll uniformly but I corrected that issue with a new cheesecake recipe that worked perfectly!  Yeah for me.  Here's the new version - I highly recommend using this one... still delicious without any balling frustrations.

Cheesecake Balls
Cheesecake recipe adapted from Better Homes & Gardens
Yield:  approximately 40 balls

Ingredients
3  8 oz. packages Cream Cheese, at room temperature
1 cup Sugar
2 T All Purpose Flour
1 tsp Vanilla Extract
1/4 cup Milk
3 Eggs, lightly beaten
1/2 cup Graham Cracker Crumbs
1 package Chocolate Candy Melts or Chocolate Chips

Instructions
Preheat the oven to 350 degrees.

In the bowl of a stand mixer combine cream cheese, sugar, flour and vanilla.  Beat on medium speed until fluffy and well combined, 2-3 minutes.  Scrape the bowl and add the milk.  Mix on low speed until combined.  Scrape the bowl and add the eggs.  Mix on low speed until combined.  Scrape the bowl again and mix to incorporate anything left on the bottom of the bowl.

Pour the batter into a cake pan (an 8"-9" circle or square will work).  Bake for 40-50 minutes until set.  Cool completely and chill in the refrigerator overnight.

Scoop the cheesecake using a small cookie scoop (about 1" in diameter) and use your hands to roll into balls.  Roll each ball in graham cracker crumbs.  Freeze the balls until firm, at least 1 hour.

Line a baking sheet with wax paper or a silpat.  Melt chocolate (I usually do this in the microwave in 30 second intervals stirring in between until melted).  Take a few balls out of the freezer at a time, leaving the rest of the balls in the freezer so they don't get soft.  Dip each ball in the chocolate (I do this by dunking the ball in the chocolate, making sure it's coated, then lifting it out with a fork.  Tap the fork on the edge of the bowl to shake off the excess chocolate).  Place the dipped ball on the prepared baking sheet.  Before the chocolate sets, sprinkle it with extra graham cracker crumbs.  Refrigerate the balls until ready to eat (these can also be frozen... we kept the extras for over a week and they were still perfectly delicious.  They actually taste pretty yummy frozen).


Let me tell you that making 400 balls is a feat of strength.  The whole process took 12 hours over the course of 4 days (now you know why I had to take a blog break).  Regardless, it was TOTALLY worth all the hard work.  Seeing my desserts on display and watching people enjoy them made my month.  Seriously.  I may have also been stalking the professional photographer as he was taking photos of them, I can't wait to see them!  Plus, I love doing things like this for my friends.  If I love you I feed you.  People I don't like can starve... kidding!

Julie