Thursday, November 14, 2013

Pumpkin Truffles

I have mixed emotions about the fact that pumpkin weeks are over.  On one hand I feel like there are so many great pumpkin recipes that I haven't had the chance to make.  I haven't even made pumpkin pie and pumpkin pie is the epitome of pumpkin desserts. (Although, I will be making and sharing my favorite pumpkin pie with you once I make it for Thanksgiving.)  On the other hand, I'm ready to mix it up and talk about other foods on the blog.

CA does not have mixed emotions - he's totally over pumpkin.


I had a hard time deciding what to make for the final pumpkin recipe.  I have a few more recipes that I've made an enjoyed before (pumpkin biscotti, pumpkin pie, pumpkin dip, pumpkin bread, pumpkin muffins) but I wanted to try another new recipe.  I'll just have to revisit pumpkin again at a later date.

I haven't made balls of any sort since I made hundreds of them for my friend's wedding.  I needed a ball break, similar to the pumpkin break I'm taking after today.  It's not that making balls is difficult, but it is awfully time consuming dipping balls in chocolate.  I did however, miss the innuendo that comes with having the word balls in every sentence I write.  I guess I could just call them truffles but that wouldn't be nearly as fun.

The pumpkin centers of these truffles are made from melted white chocolate, pumpkin puree, graham cracker crumbs, cream cheese and powdered sugar.  The great part about how these are made is that you just throw everything in the food processor and whiz it up until it's nice and smooth.

The only problem is that you then have to refrain from eating it all before you get a chance to cover it in chocolate.  If you have judgmental eagle eyes  you will see the imprint of my finger running through the filling in the picture to the left.

The mixture is very soft due to the soft cream cheese and melted white chocolate so it has to rest in the refrigerator for a few hours before it's hard enough to roll into balls.  I actually lost track of time and ended up leaving mine in the fridge overnight which was fine except that every time I opened the fridge I stuck a spoon in it.


Once the insides were scooped and rolled into balls, they managed to soften up so they needed to be chilled again before they are dipped in chocolate.

I had some trouble dipping these - the bottom kept sticking to the fork I used for dipping so I couldn't get them off the fork without mangling them.  I rectified this by holding each one between my fingers, dipping one side in the chocolate and sticking them in the fridge until the chocolate hardened.  Then I dipped the whole thing in chocolate again.  The already hardened first layer of chocolate was hard enough to keep it from sticking to the fork .  It worked perfectly!


These are some of my favorite balls of all time.   The insides are super creamy and the pumpkin flavor is prominent.  The biggest surprise for me was how much I loved the flavor of the graham crackers in the mixture.  It added such a great buttery and spicy element (not hot spicy, spices spicy).  All of this also paired perfectly with the chocolate.  I can't say enough good things about these.

My coworkers were super impressed by these.  In fact,  someone walked by my office holding one and exclaimed "What is in these?"  In a good way.

Now that pumpkin week is over you can expect more variety on the blog until I come up with another obsession.  Peppermint?  Cranberries?  Who knows.


Pumpkin Truffles
Adapted from Smile Sandwich
Makes 18 truffles (you should double it, I did!) 

Ingredients
1/2 cup White Chocolate Chips
1/4 cup Pumpkin Puree
2/3 cup Graham Cracker Crumbs
1 oz. Cream Cheese
1/4 cup Powdered Sugar
5 oz. Chocolate Candy Melts
2 tsp Shortening


Instructions
Melt the white chocolate in a microwave safe bowl for 60 seconds.  Remove from the microwave and stir.  Continue microwaving in 15 second intervals, stirring in between, until the chocolate is melted.

Add the melted white chocolate, pumpkin puree, graham crackers, cream cheese and powdered sugar to a food processor.  Blend until the mixture is completely smooth.  Refrigerate the dough for 3 hours or overnight until firm.

Scoop and roll the dough into 1 inch balls.  Place on a waxed paper lined baking sheet and freeze for 15 minutes until firm.

Place the chocolate candy melts and shortening in a microwave safe bowl.  Microwave for 60 seconds, remove from the microwave and stir.  Continue microwaving in 30 second intervals, stirring in between, until the chocolate is melted.You don't want to use a huge bowl because you want the chocolate to be a few inches deep to make dipping the truffles easier. (I found that a cereal bowl works well).

Dip each ball in chocolate and set it back on the waxed paper lined baking sheet.  Let sit at room temperature until the chocolate hardens.  Store in the refrigerator until ready to eat.


Enjoy!
Julie

Wednesday, November 13, 2013

Pumpkin Oreo Cheesecakes

Pumpkin cheesecake is a classic.  I've had quite a few good and some not so good pumpkin cheesecakes.  Although, let's be honest that combining cream cheese, sugar and pumpkin is a good idea.  You have had pumpkin dip haven't you???  I do could eat that with a spoon.


I was initially a little skeptical of this recipe.  While I've baked more with Oreo cookies on this blog than I ever thought I would, I realized one thing.  People LOVE Oreo cookies.  Anytime I put them in something people go nuts.  I'm not cuckoo for Oreos so I don't quite understand this phenomenon, but I've been trying to embrace it.

I think my initial reservations came from the fact that I firmly believe that cheesecakes belong on graham cracker crusts (the same goes for key lime pie).  However, when I mentioned this recipe to a good friend of mine and to CA, their eyeballs got larger than normal so I took that as a good sign and put it on the pumpkin week agenda.

The cheesecake portion of this dessert is pretty standard... cream cheese and sugar are whipped together until really fluffy, then the eggs go in followed by pumpkin, spices and sour cream.

I love sour cream in cheesecake - it really keeps it from being too dense and enhances all the other flavors.  Alton Brown's Sour Cream Cheesecake recipe is one of my favorites (I tried to use it to make cheesecake balls, but it was too soft for this purpose - making it perfect for regular cheesecake)


The great thing about these cheesecakes is that they are miniature - which means they're great for sharing (and you know I love that!) 

The base is one side of an Oreo cookie popped into a cupcake liner.  I put the side with the cream on the bottom because that seemed like the best thing to do.  I'm not sure why nor am I sure that it makes a difference because after they were baked I couldn't identify the cream - I think it just melts pumpkin cheesecake filling.

Not only do these get an Oreo base but they also get an Oreo topper courtesy of the non-cream side of the Oreo. 

They are like little pumpkin cheesecake sandwiches which makes them super easy to eat while holding them between your fingers.

These sweet sandwiches baked up nice and fluffy.  Even after removing the cupcake liners, both Oreo sides stayed put (for some reason I thought they would try to fall off).

In hindsight I have seen cheesecakes with a chocolate crumb base and this method of putting the whole cookie in a muffin pan is ten times easier than grinding up the cookies only to mush them back together again in crust form.

The combination of Oreo cookies and pumpkin cheesecake is pretty darn delicious.  I'm the only one who was surprised by this fact, CA expected them to be great and he liked them too (although it's possible he didn't get his allotted share because I ate them).  I love that they are individually sized and that the cheesecake layer is super light. 


The recipe can be found at Inside BruCrew Life.  I followed it exactly.

Enjoy!
Julie

Tuesday, November 12, 2013

Pumpkin Banana Bread

I have a pumpkin bread recipe that I really like but sharing a regular old pumpkin bread recipe would be boring and I'm not in the business of boring you... at least not intentionally.  Therefore, when I saw this hybrid recipe I figured it would be a different take on the classic.  Plus I like banana bread and pumpkin bread so combining the two together should be great right?


The bread is made by mixing together ripe bananas, pumpkin puree and sugar together.  Then eggs and oil are added, followed by the dry ingredients... flour, baking powder, cinnamon, cloves and salt.

The original recipe says that it will make three loaves of bread.  I cut it in half and then decided to put it all into one loaf pan (which is typically a recipe for me making a huge mess of overflowing batter all over the bottom of my oven).  Much to my surprise the bread didn't rise all that much so there was no catastrophe to report.  Sorry to disappoint you, but it does lead me to question what size pan this person refers to a "regular-sized".

The one addition I made to the original recipe was to sprinkle some pumpkin seeds on top.  Aside from the fact that I bought a giant bag of pumpkin seeds when I made bran muffins, I thought they'd add a little crunch and additional pumpkin element to the bread.
This bread is very good but it tastes like banana bread.  Likely because there's twice a much banana in here than pumpkin (2 bananas to 1/2 cup of pumpkin puree) and pumpkin has a pretty mild flavor to begin with.  This being pumpkin week, I wanted more pumpkin flavor. 

Apart from the lack of pumpkin flavor, I was a fan... it is very moist and I liked the crunch that the pumpkin seeds added on top.

CA liked it too but he agrees it is too bananay to be called anything other than banana bread.  Oh well, I guess it wouldn't be real life if every one of the ten pumpkin recipes of pumpkin week(s) were big time winners.


Pumpkin Banana Bread
adapted from Stick To Your Hips

Ingredients
2 1/2 cups Flour
2 1/2 tsp Baking Powder
1/2 tsp Cinnamon
1/4 tsp Ground Cloves
1/4 tsp Salt
2 Ripe Bananas, mashed
1/2 cup Pumpkin Puree
3/4 cups Sugar
1 Egg
1 Egg White
1/2 cup Vegetable Oil
2 T Pumpkin Seeds

Instructions
Preheat the oven to 325 degrees.  Coat a loaf pan with cooking spray.

In a medium bowl combine the flour, baking powder, cinnamon, cloves and salt.  Set aside.

In the bowl of a stand mixer fitted with the paddle attachment, mix the bananas, pumpkin and sugar on medium speed until well combined.  Add the eggs and oil and mix on low speed until just combined.  Add in the flour mixture and mix on low speed until just combined.

Pour the batter into the prepared pan.  Top with pumpkin seeds (if using) and bake for 45-50 minutes until a toothpick inserted in the center comes out clean.  Cool completely before removing from the pan.


Enjoy!
Julie

Monday, November 11, 2013

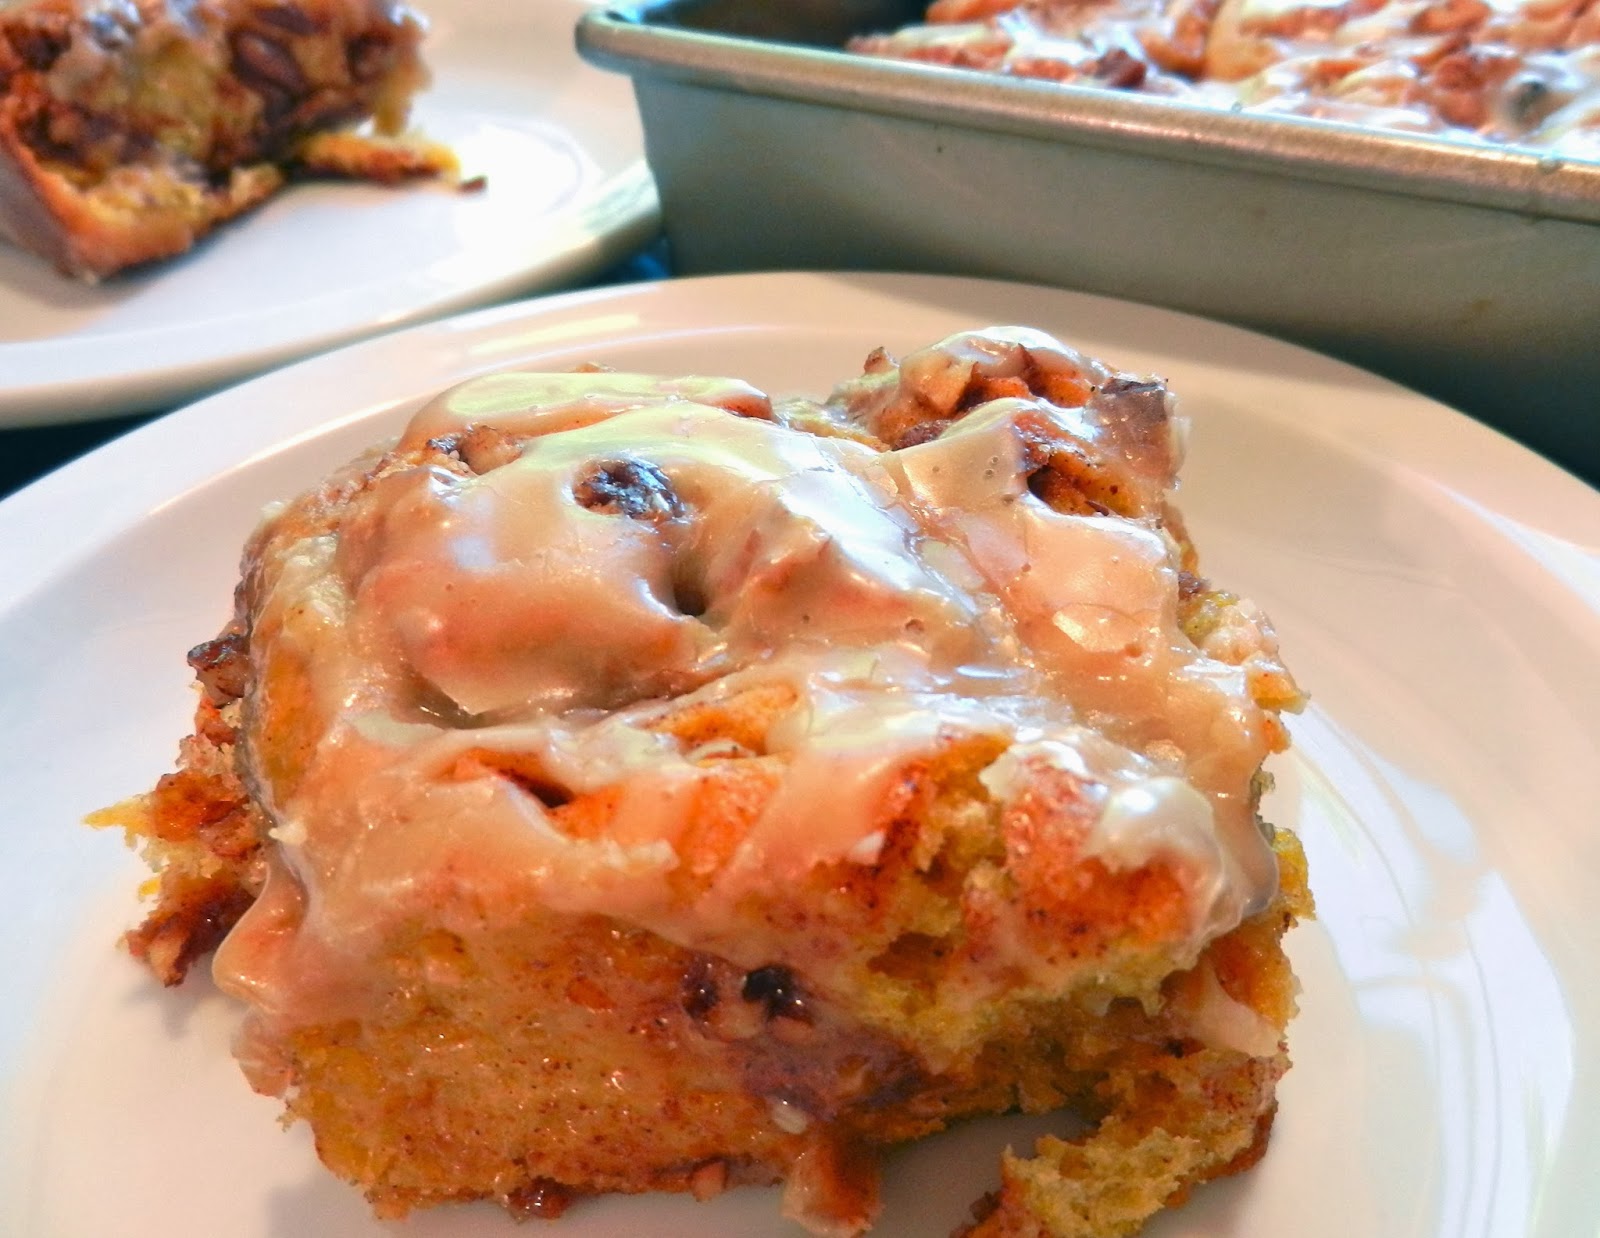
Pumpkin Cinnamon Rolls

Bakerella posted the recipe for these pumpkin cinnamon rolls less than a month ago but it was pretty clear that these needed to be added to the pumpkin week agenda STAT.  Before seeing this recipe, I was going to try pumpkin doughnuts but CA voted for cinnamon rolls and it was a good decision all around.


I made a few modifications to the recipe to based on personal preference and to make it easier for me to have fresh cinnamon rolls at a fairly reasonable breakfast time.

The main change I made was to make the dough the day before and then let it rise in the refrigerator overnight.  This worked perfectly for me.

This dough recipe is excellent!  Flour, sugar, pumpkin pie spices, and salt are mixed together with butter, milk, yeast, egg and pumpkin puree.  All that gets to rise for a few hours (or overnight in my case)  It's pretty darn delicious.


I didn't actually have pumpkin pie spice mix but I found a recipe for it that says to substitute 3 parts cinnamon to 1 part each of nutmeg, allspice and ginger.  Because this recipe calls for 2 tsp of pumpkin pie spice I put in 1 tsp cinnamon, 1/3 tsp nutmeg, 1/3 tsp allspice and 1/3 tsp ginger.  It worked perfectly and I didn't have to buy yet another spice mix to put in my cupboard.  Another good decision.
I woke up in the morning to perfectly risen dough and get started on filling, rolling and baking...

The dough gets rolled out and filled with brown sugar, white sugar, pecans and cinnamon.  It's an amazing mixture and very classic cinnamon roll (if you like nuts in your cinnamon rolls which I'm firmly in favor of).


I cut back on the amount of butter and sugar in the filling.  This is a very unusual for me and it had nothing to do with me wanting them to be healthier (it's a cinnamon roll, it's supposed to be a sugar bomb!).  The reason I cut back was that I honestly couldn't find anywhere to put all that stuff.  The dough was so well coated with roughly half the amount that I just stopped.  I did however put all the nuts in there.  More good decisions.

All that goodness gets rolled up as tightly as possible inside the dough and sliced into individual portions.  I didn't do a great job rolling these very tightly, or slicing them, or lifting them from the counter into the pan without making a giant mess so my rolls weren't perfectly rolled by the time they made it to their final baking place. 

Who cares?  They were still beautiful and delicious and filled with sugar and nuts and cinnamon.

After getting the rolls settled, they rise for about 30 minutes before getting baked up (mine hardly rose at all, again, who cares?  It didn't affect the end product as far as I can tell).

My third and fourth recipe modifications came with the icing. 

The original recipe calls for maple flavoring which I don't have (and I'm not even sure what is it) so I substituted maple syrup.  It worked great.

Then I had a flash of brilliance and decided to add dark rum to the icing.  Best decision ever.

These cinnamon rolls are freakin' delicious - I love them.  CA really loved them and ate them long past when I thought that eating the leftovers was safe.  I have a 3 day rule on leftovers and he has a 2 week rule.

Before you worry about why we had leftovers and conclude that it's because these aren't amazing, notice that I made a full 9x13 dish of cinnamon rolls for 2 people.  We gave a few away to coworkers but kept a lot of them at CA's insistence so you should not take the existence of week-long leftovers to be any indication as to the deliciousness of this recipe.  It's great.  The dough is soft and pumpkiny and yeasty.  The filling is sweet and nutty.  The icing is deliciousy and mapley and rummy.  Just plain good.

Pumpkin Cinnamon Rolls with Maple Rum Icing
Adapted from Bakerella

Ingredients

For the Dough
4 cups Flour
1/4 cup Sugar
1/2 tsp Salt
2 tsp Pumpkin Pie Spice (3:1:1:1 mixture of cinnamon, nutmeg, ginger and allspice)
4 T Butter
1 cup Whole Milk
2 1/4 tsp (1 packet) Active Dry Yeast
1 Egg
3/4 cups Pumpkin Puree

For the Filling
1/2 cup Butter, melted and divided
1 1/2 T Cinnamon
1/3 cup Brown Sugar, packed
1/4 cup Granulated Sugar
1 cup Pecans, toasted and coarsely chopped

For the Icing
2 cups Powdered Sugar
2 T Butter
1 T Maple Syrup
1 T Dark Rum
2 T Whole Milk

Instructions
Combine flour, sugar, salt and spices with a wire whisk in a medium bowl. Transfer 3 cups of the flour mixture to the bowl of your stand mixer and set the remaining 1 cup aside.

Heat butter and milk in the microwave until the butter is melted and set aside until warm. Sprinkle yeast on the surface of the warm milk/butter mixture and let rest for about 5 minutes. Then gently stir together and add to the flour mixture. Mix on low using the paddle attachment until combined. Add egg and mix until combined and then add pumpkin and mix until combined.

Change to the dough hook and add the remaining one cup flour and knead on low speed for about 10 minutes.

Spray a medium bowl with non-stick spray. Then remove dough from mixing bowl. Knead a couple of times, shape into a ball and place in coated bowl. Turn over to coat both sides. Cover bowl with plastic wrap and let rise in a warm spot for 2 hours until it doubles in size or in the refrigerator overnight.

Preheat the oven to 375 degrees.  Butter or spray a 9 X 13 baking dish.

Turn out dough onto a well floured work surface and roll into a roughly 12 X 18 inch rectangle until it's about 1/4 inch thick.  Place the dough so that the long side is facing you.

Spread 6 T of the melted butter on the dough, reserving the additional 2 T. Then sprinkle cinnamon, sugar, brown sugar and chopped pecans until the dough is covered.

Start with the long side farthest from you and start rolling the dough toward you to form a log. Roll tightly and shape as you go if necessary. Then turn the dough log seam side down and cut into 15-18 equal sections using a serrated knife.

Place on prepared baking dish, brush with the remaining 2 T of melted butter and let rise again in a warm spot for about 30 minutes before baking. Bake for 25-30 minutes until the rolls are set in the center the tops are golden brown.

While the rolls are baking, make the icing.  Heat the butter over medium heat until it melts and turns golden brown. Watch closely so it does not burn.  Add the powdered sugar and whisk until combined.  Whisk in the maple syrup, rum and milk until completely smooth.

Remove rolls and spread icing over cinnamon rolls while still warm.

Enjoy!
Julie

Sunday, November 10, 2013

Pumpkin Cheese Puffs

I think it's funny that you all believed that pumpkin week would only last one week.  We obviously aren't well acquainted.

The pumpkin recipes that I've made many times before (pumpkin snickerdoodles, pumpkin chili and pumpkin biscuits) took up the majority of the first week which only left time for me to try 2 new pumpkin recipes and that simply wasn't acceptable.  Therefore, pumpkin week continues...


Today's pumpkin recipe is the last savory recipe in the pumpkin series - it's all sweets from here on out.  I chose these pumpkin cheese puffs because I definitely wanted another savory option to share on the blog and CA is partial to all things cheese.

I've made cheese puffs before and the process is like making pate a choux (in fact there is a cheese puff recipe in the pate a choux chapter of the Bouchon Bakery cookbook that I still need to get to).  Pate a choux is used to make cream puffs and eclairs and these delicious peanut butter concoctions

These cheese puffs are made by cooking milk, butter, salt and flour together and then whipping in a bunch of eggs (standard puff stuff).  Then you add the goodies...  pureed pumpkin, cheese and maple syrup.  I was worried the syrup would make them sweet which would defeat the entire purpose of my sharing a savory recipe with you, but it was just a couple of tablespoons which didn't add sweetness so much as a rich flavor... because cheese and eggs and flour isn't rich enough.

The mixture gets piped onto a baking sheet and topped with a little more cheese and some crispy proscuitto.  Whatever you do, don't skip the proscuitto - the addition of that salty element is absolutely perfect!
Once baked these puff up due to all the moisture in the dough that creates steam inside the pastry.  I wish they had been a little bit more puffy - but that's just me being picky.


I really enjoyed these puffs and so did CA.  We had them as an appetizer before dinner and I don't remember what we ate for dinner... all I remember are the puffs.  That must mean they're good.  They are light and cheesy and salty which is all you can ask for.  I'm not entirely sure that I can taste the pumpkin in these but I do think it gave them a nice color.

Pumpkin Cheese Puffs
from Go Bold With Butter
Makes 40-45 puffs

Ingredients

1 cup Whole Milk
1/2 cup Butter
1/2 tsp Salt
1 cup Flour
6 Eggs (divided)
1/2 cup Pumpkin Puree
2 T Maple Syrup
1 cup + 2 T shredded Gruyere or Swiss Cheese
2 T Water
4 slices Proscuitto, chopped and cooked until crispy
 Instructions
Preheat oven to 400 degrees.

In a medium saucepan, bring milk and butter to a boil. Add the salt and flour, reduce heat to low and cook for another 2 minutes, stirring constantly, or until the edges of the dough pull away from the sides of the pan.

Remove the mixture from the pan and add it to the bowl of a stand mixer fitted with the whisk attachment.  Add 5 of the eggs, one at a time, mixing well before adding the next egg. Add pumpkin, maple syrup and 1 cup cheese and mix to combine.

Put mixture in a piping bag or a gallon sized ziploc bag.  Snip the tip of the bag by ½ inch.  On a large baking sheet lined with a silpat or parchment paper, pipe the mixture into rows of balls about ¾ inch high and about 1 ½ inches apart.

Make an egg wash with remaining egg and 2 tablespoons water, whisking to combine. Brush the tops with egg wash and garnish with remaining cheese and crispy prosciutto.

Bake for 15 to 20 minutes or until lightly browned on top.


Enjoy!
Julie

Thursday, November 7, 2013

Pumpkin Walnut Cupcakes with Nutella Frosting

I realize that yesterday I told you that pumpkin and butterscotch were best friends. I lied.

I take that back - I didn't lie, I just didn't know yet how amazing pumpkin and Nutella are together.
However, these cupcakes are not all about the frosting - the pumpkin cake base is pretty darn good too!  It contains what you would expect... pumpkin puree, vegetable oil, eggs, spices, brown and white sugar and flour.  It also contains sour cream - which I'm a big fan of in cakes because I think it helps lighten the cake and the sourness enhances all the other flavors.  (My favorite pumpkin and banana bread recipes both contain sour cream).  Another bonus ingredient is chopped walnuts - I thought long and hard about whether to leave these out (and you totally can if you want to) because I wanted it to be like cake and not like pumpkin bread but I opted to leave them in... mostly because I already had them in the house.  In the end, I liked the nuts in there - especially paired with the nutty Nutella flavor.
The original recipe calls for making a big cake out of this batter, but I opted for cupcakes for easing sharing.  In fact, I made regular and mini sized cupcakes because I ran out of regular size cupcake liners.  They both came out great and baked up nice and fluffy!

Now let's talk about the frosting because you can't have cupcakes without frosting... those are muffins.

This frosting is interesting in that there is no butter in it.  Weird right?  In fact this entire recipe doesn't have butter in it which is quite unusual for any of my dessert recipes.  This frosting is mostly Nutella with some sour cream and powdered sugar mixed in.  You then add a little bit of milk to thin it out just enough to spread it on the cupcakes.

What I loved about this frosting (aside from the fact that it tastes like Nutella) was that it held up really well.  It didn't wilt or get too soft when it sat at room temperature.

Luckily, I made a little bit too much frosting and have been spreading it on graham crackers.  I recommend it.

Together the light and fluffy pumpkin cake and the rich Nutella frosting are a perfect pair.  I'm beginning to think that pumpkin is not meant to be monogamous.


Pumpkin Walnut Cupcakes (or cake) with Nutella Frosting
adapted from The View from Great Island
Makes 1 9" cake or 18 cupcakes

Ingredients

For the Cake
1 cup Pumpkin Puree
1/2 cup Vegetable or Canola Oil
2 Eggs
1/2 cup Sour Cream
1/4 tsp Cinnamon (you could also substitute all 4 spices for 1 tsp of Pumpkin Pie Spice)
1/4 tsp Nutmeg
1/4 tsp Allspice
1/4 tsp Cardamom
1/2 cup Brown Sugar
1/2 cup White Sugar
2 cups Flour
1 tsp Baking Soda
1/2 tsp Salt
1 cup Chopped Walnuts (optional)

For the Frosting
1 cup Nutella
1/4 cup Sour Cream
1 1/3 cup Powdered Sugar
Milk to thin it out (I used 2 T)

Instructions
Preheat the oven to 350 degrees.  Line a muffin tin with cupcakes liners or lightly grease a 9" spring form pan.

In a large mixing bowl, whisk the pumpkin, oil, eggs, sour cream, sugars and spices. Make sure everything is well combined.

In a separate small bowl whisk together the flour, soda and salt.

Fold the dry ingredients into the wet, mixing just until combined. Fold in the walnuts.

Scoop the batter into the prepared muffin tin or greased pan.  For cupcakes, bake for 25-28 minutes until a toothpick inserted near the center comes out without wet batter clinging to it. (Mini muffins bake for 20 minutes; the 9" cake bakes for 50 minutes). Cool briefly before removing from the pan.

Make the frosting by mixing together the Nutella, sour cream and powdered sugar. Add just enough milk or cream for a spreadable consistency. Add a little more sugar if the frosting seems too thin. Spread on the completely cooled cake.

Enjoy!
Julie

Wednesday, November 6, 2013

Pumpkin Scotchies

I did not expect to like these cookies as much as I did.  In preparation for Pumpkin Week, (apart from a few of my old favorite pumpkin recipes) I've been pinning pumpkin recipes like mad and then I read them aloud to CA and if he reacts favorably, I put it on the list.  When I told him that one of the options was pumpkin butterscotch oatmeal cookies, he said "I really like butterscotch" -- a fact I was completely unaware of until this moment.  I've made cookies with butterscotch in them before but I don't recall any sort of positive butterscotch reaction back then.  I swear that even after being married for 10 years he often says things I never would expect. 

All that said, I made these cookies because CA said he likes butterscotch.


This recipe is quite simple - beat the wet stuff together (butter, sugar, eggs, pumpkin vanilla) and then mix in the dry stuff (flour, baking soda, salt, spice), add the oatmeal and then the butterscotch chips.

I just realized that I'm not entirely sure what butterscotch actually is - even though I eat it and I like it.  Wikipedia tells me its basically soft toffee.  No wonder I like it.

The finished dough is pretty sticky so a cookie scoop is particularly helpful in getting these from the bowl to the pan.

I've never paired butterscotch and pumpkin together before.  I've always stuck with traditional pairings like cinnamon and nutmeg - but let me tell you that pumpkin and butterscotch are secret lovers.  They are really quite amazing together!


I have one small complaint with these cookies and that is that they get really soft after they sit around for an hour or so.  Eating them right out of the oven would be my preference but that's not always practical.  You could add more flour or oats but I suggest just baking them longer to try and dry them out (there's a lot of moisture in pumpkin).  Other than that, these are pretty freaking delicious cookies - straight out of the oven they may even rival the pumpkin snickerdoodles for favorite pumpkin cookie.. and that's saying something.


The recipe can be found on The Girl Who Ate Everything.  I recommend baking them for 13-15 minutes.

Enjoy!
Julie