Thursday, February 13, 2014

Baking Bouchon - Recipe 79: Layered Fruit Marshmallows

I was not excited about making this recipe.  It is essentially vanilla, raspberry and lemon flavored marshmallows layered on top of each other and covered in chocolate.  You have to be pretty precise when making marshmallows to make sure that you don't cook the sugar too much or too little or burn the house down in the process.  Making three kinds of marshmallows seemed like a lot of work and a lot of opportunities for me to set something ablaze.  Plus, I'm weird about fruit flavored things and I was worried that I would spend hours making these treats only to hate the raspberry and lemon marshmallows.


This was quite a bit of work.  I had to measure out three sets of everything and deal with the flavorings. 
  • The vanilla marshmallow is flavored with vanilla beans.  
  • The raspberry marshmallow is flavored with raspberry powder which I made by grinding up freeze dried raspberries which are weird and remind me of astronaut ice cream.  A long time ago in the 80's the kids in my elementary school class were obsessed with astronaut ice cream but I think the stuff is disgusting.  Food that literally disintegrates while I'm eating it freaks me out.  This is also why I don't like Whoppers.  The marshmallows also have pink food coloring in them.
  • The lemon marshmallow is flavored with lemon zest which is not disgusting.  They also have lemon food coloring in them.

I did manage to make all three marshmallows without screwing them up but it took all freakin' day plus I had to wait for them to set up overnight before I could slice them and cover them in chocolate.

The vanilla was up first and got spread onto a half sheet pan and cools for an hour until it's completely set.

The raspberry was next and gets spread on top of the vanilla and cools for another hour.

The lemon goes on last and then you wait overnight so that everything is cool and set up for real before slicing these into squares.

If you're intrigued by how marshmallows are made - you can check out my post on Marshmallow Eggs when I went into more detail.  I will not subject all of you to all of that science again.
Once they rested overnight, I brushed the entire surface with melted chocolate and then I was able to remove them from the pan and reveal the layers.  I have to admit the layered affect is really pretty!


After they all got sliced into squares it was time to cover the other 5 sides in chocolate.  I was supposed to do this by dipping them but I did that with one and was convinced that the chocolate was going to be way too thick so I decided to take a knife and spread the chocolate on the remaining sides of the treat.  I'm glad I did.  While the effect wasn't as smooth and pretty as it would have been if I'd successfully dipped them all, the chocolate was thin enough that you could bite through it without completely mushing the marshmallow which I think was more important.


These guys were a pleasant surprise.  I was even fine with the fruit flavored portion of the marshmallow.  I think that was because I knew there wasn't any fake fruit in there (I'm ignoring the raspberry dehydration process).  The marshmallows had a great texture and weren't crazy sweet so the dessert felt very light.  The one bad thing I have to say about them is that I felt like the lemon marshmallows overpowered the other flavors a little bit.  If I made these again, I'd probably stick with the vanilla marshmallows, but I'd still cover them in chocolate and then I'd stick them in some hot cocoa to stop me from freezing in the polar vortex.

Every morning that I bring treats into my office I send out an email and tell everyone what is available and I think "Chocolate Covered Layered Fruit Marshmallows" scared off a few people.  Honestly, I wouldn't have tried them if I'd received said email.  However, the adventurous ones who did try them had really nice things to say and convinced the more skeptical to dig in.  It's a good thing my coworkers are so open to trying new things because it won't be long until they receive an email announcing Nougat Aux Fruit.  I can hear the stampede now.

Enjoy!
Julie

Wednesday, February 12, 2014

Baking Bouchon - Recipe 78: Vegetable Demi-Baguette

I'm really trying to knock out all this bread and I'm really trying to do it with a smile on my face.  This recipe did not help my cause.


Basically this is a standard baguette recipe where you use vegetable broth instead of water in the dough. 

Can we take a moment to discuss why I can't type the word broth without typing the word brother and having to go back and correct it?  It's been happening a lot lately and is really starting to irk me.

I was supposed to make my vegetable brother but I was in no mood to do that and I already had a box of vegetable broth (again!!!).  I typically buy vegetable broth and substitute it for chicken broth (grrr!!!).  I don't actually think it's any better for you and I'm certainly no vegetarian, I just like the flavor. 

Anyway, I made this bread and expected it to have more flavor that the other breads I've made because of all the flavor in the broth.

It didn't happen.  It still tasted like water.  In fact, I think this bread tasted more like water than the bread with water in it. 

The one upside is that I proofed and baked the bread in these baguette pans that I have which meant that I didn't end up with misshapen bread from transferring it into the oven.  At least it was pretty.


I'm just glad that the next bread I plan to make are English Muffins who are far more interesting than the other breads I've been making lately.  Maybe I'll just go on a bread baking binge and finish this chapter so we don't have to talk about this anymore.

Enjoy!
Julie

Tuesday, February 11, 2014

Pumpkin Seed Granola Bars

One of the things I have an abundance of in my pantry that needs to be used up are seeds and nuts... walnuts, pecans, sliced almonds, sliced almonds, pepitas, pistachios, sunflower seeds... it's too much so I imagine you'll be seeing a few granola, granola bar, nut bar type things on this blog over the next month or so.


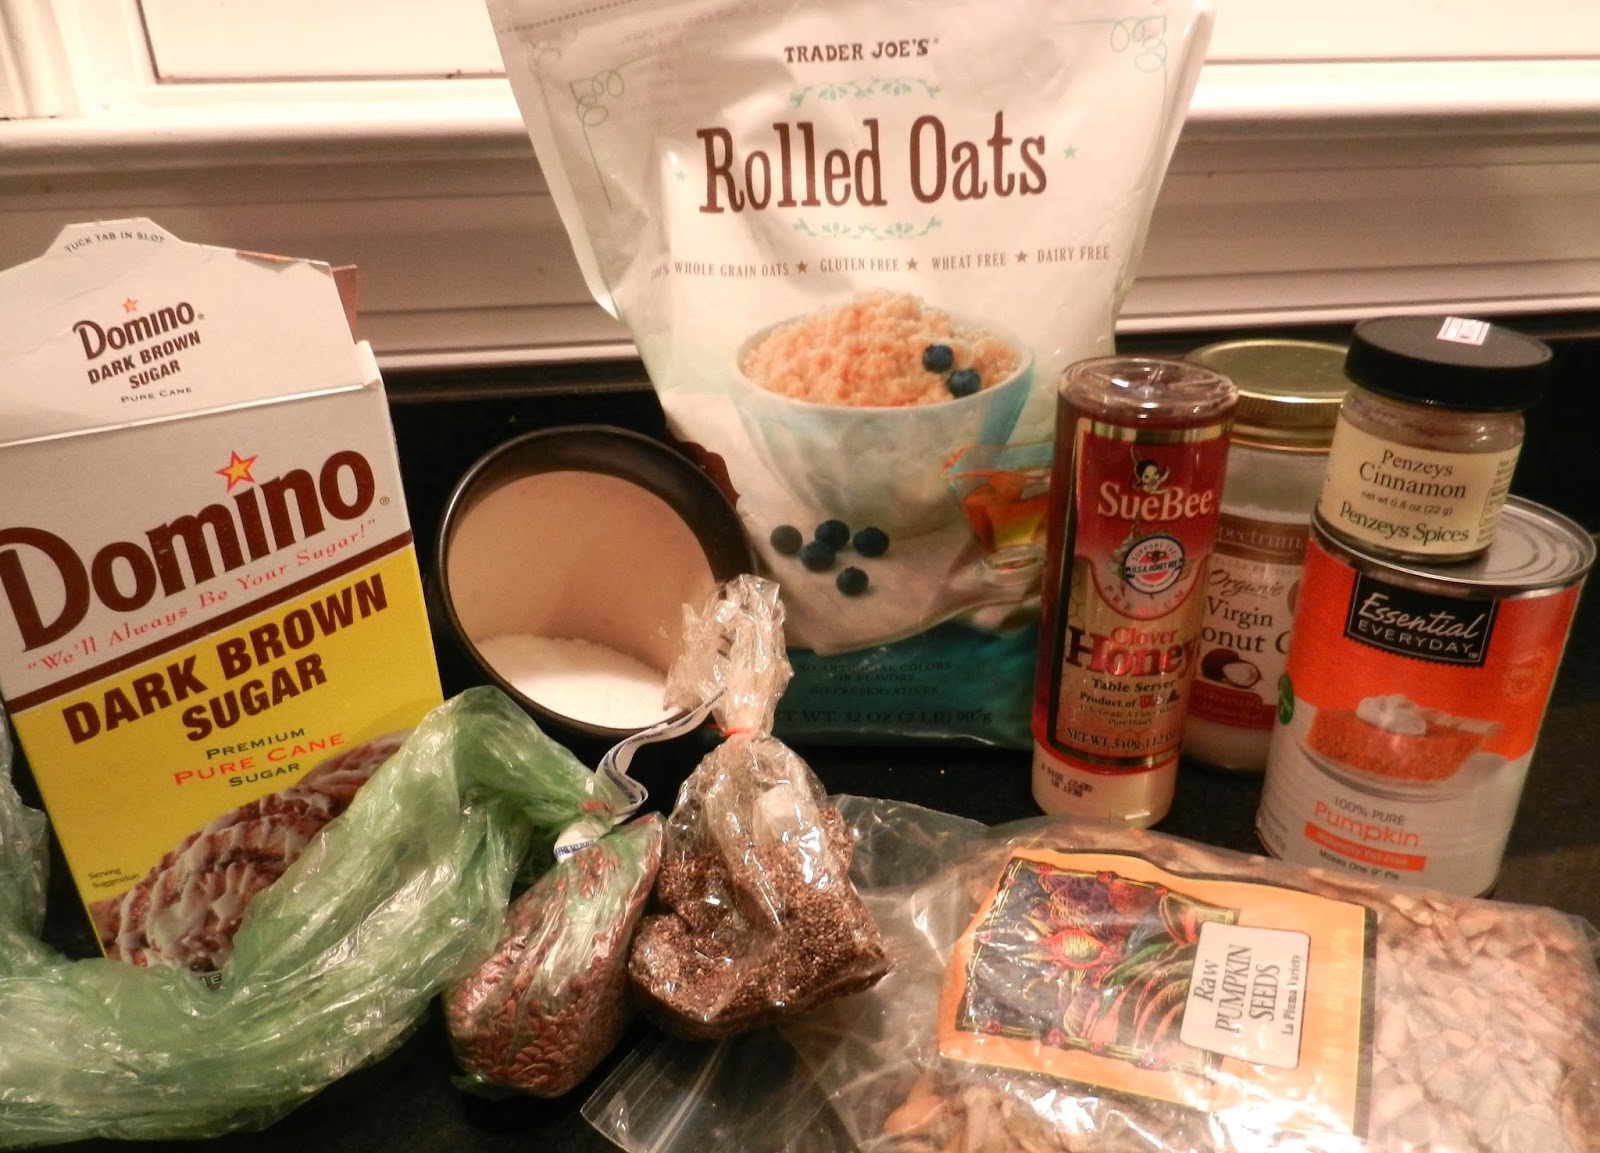
After making this recipe my pantry is lighter one can of pumpkin puree, all the chia seeds, all the flax seeds and half of the pumpkin seeds.  (Seriously, what is it going to take to get rid of all these freakin' pumpkin seeds? It's like Mary Poppins carpet bag over here.)

All in all these are relatively healthy.  They're packed with nutrient rich nuts and seeds.  I even used coconut oil which I'm still not on board with for all of my cooking but is supposed to be a healthier fat than most.  There's also pumpkin puree in here which is high in vitamins and fiber.

I tried to cut back on the sweet ingredients a little bit here but I know that those are what make granola bars stick together.  Without enough sugar the bars won't harden up and will just crumble into pieces when you try to cut them into bars.
Granola bars are actually pretty easy to make.  You simply mix up all the ingredients to form a uniform gooey mess.

You don't even need a mixer, you can definitely do this by hand.  I used to make granola when I worked in the bakery and we mixed it all by hand and we made HUGE batches!  Every time I made it I would be up to my elbows in granola... literally.

The gooey mixture gets pressed into a pan and baked at a low temperature for an extended period of time.  The low temps and long time help dry all the moisture out of the granola bars so that they are crunchy and stick together when you slice them up.

These didn't dry out exactly as much as I wanted to and they were still a little bit crumbly.  In hindsight I probably should have baked them a little bit longer to dry them out a bit more.


Overall these were pretty good.  I actually have a bunch of coworkers who are pretty health conscious and I think they were grateful that I finally brought something into work to share that wasn't laden with butter and sugar and/or chocolate.


Pumpkin Seed Granola Bars
Adapted from Heather Christo

Ingredients
1/2 cup Coconut Oil
4 cups Oatmeal
3/4 cup Honey
1/4 cup Brown Sugar
3/4 cup Pumpkin Puree
1 tsp Cinnamon
1 tsp Salt
1/4 cup Chia Seeds
1/4 cu Flax Seeds
1 cup Pepitas (pumpkin seeds)

Instructions 
Preheat the oven to 325 degrees. Line a 9"x13” pan with a sheet of parchment paper.

Place the coconut oil in a small heat proof bowl and microwave for 20-30 seconds, until melted.

In a large bowl, combine the oats and the coconut oil and mix until the oats are well coated.  Add the honey and the brown sugar, pumpkin and cinnamon and salt and mix to combine.  Add the chia seeds, flax seeds and pepitas and mix in.

Transfer the granola to the prepared pan and spread it out over the pan evenly, pressing it down with the spatula.

Bake the granola bars at 325 degrees for 30 minutes and then press down hard with a spatula.  Bake the granola bars for another 20 minutes.

Let them cool completely (I left mine out overnight) before slicing them into bars.

Enjoy!
Julie

Monday, February 10, 2014

Dijon, Ham and Asparagus Roll Ups

I bring you another easy to put together dish that is a great appetizer or brunch food.

You may be expecting these to just be asparagus and ham rolled up together with some mustard, but you'd be wrong.  These are asparagus and ham roll up in crescent rolls with mustard on them.


Why do Pillsbury Crescent Rolls taste so good?  I tried to make my own once and they just aren't the same.  Is it the preservatives?  Do they use a ton of butter?  Maybe it's that little dough boy who, let's be honest, is a little bit creepy.  He has a human face, giggles like a kid but yet we find it appropriate to want to bake and eat him.  Whatever it is, I don't buy them unless they are for a specific purpose because if they are in front of me I'll eat the whole popping can.  Just like Grands Biscuits and those canned Cinnamon Rolls with the little can of icing.  I can't resist those either.


Making this recipe is super easy and is more about assembly than it is about cooking.

Step 1: Pop open the can of crescent rolls and lay them out.   I love opening those things.  I wish more stuff was packaged like this.  It's almost a little bit scary because you don't know exactly when it's going to pop.  Will it pop when you take the outside paper off?  Do you need to press lightly or will you have to press really hard.  You never know and then suddenly it's open and it always surprises me just a little bit.  It's like opening champagne.

Step 2: Spread each crescent roll with Dijon mustard.  I've made these a couple of times and I say the more mustard the better.  If you only spread a thin layer on there you won't get any of the flavor in the finished dish.  Mustard it up.

Step 3: Wrap a par-cooked asparagus spear in ham.  I like to use 2 slices of very thinly sliced ham so you get the ham flavor but you're not trying to chew through a thick slice of ham.  No one wants to be trying to daintily eating something at a party only to have to gnaw on some big old ham slice.

Step 4:  Put the hammy asparagus on the mustardy crescent roll dough and roll that puppy up.

Step 5: Bake.

Step 6: Try to eat just one.


I really love these.  You get a great combination of the bitter asparagus, spicy mustard, sweet ham and warm and buttery crescent roll.  It's kind of like serving a sandwich but so much better.  They are great brunch of appetizer food because people think they're eating vegetables (which they are) but they're really eating hammy, doughy deliciousness which is what they really want anyway.  Trust me.

Dijon, Ham and Asparagus Roll Ups

Adapted from The Daily Meal
Makes 16 Roll Ups

Ingredients 
16 stalks Asparagus
2 packages Crescent Rolls 
Dijon Mustard
16 slices Ham (or 32 if they're really thinly sliced)


Instructions
Preheat the oven to 375 degrees.

Break off the woody parts of the asparagus stem so that only about the top 3-3 ½ inches of the stalk remain. Place the asparagus in a microwavable bowl with just enough water to cover. Then, place a towel over the top of the bowl. Microwave for 2 minutes or until tender.

Spread out the crescent roll dough evenly on a large baking sheet. Coat the dough with a generous layer of Dijon mustard. Wrap 1 asparagus stalk in 1-2 slices of ham. Place the wrapped asparagus at the wide end of the crescent dough and roll up in the dough. Repeat for each crescent roll.

Bake until golden brown, about 12-15 minutes. Remove from the oven, let cool slightly, and serve warm.

Enjoy!
Julie

Sunday, February 9, 2014

Mini Corn Dog Muffins

Don't you just love fair food?  Pretty much any time I go to a fair or carnival or amusement park, I eat way too much food and all of it is really bad for me and then I feel nauseous.  Maybe it's that there is an abundance of foods on a stick which are so much better than foods not on a stick.  Or maybe it's because I eat a lot of food and then ride those crazy carni rides.

The only fair food that I absolutely love that is not on a stick are funnel cakes which are a whole category to themselves.  Nothing beats a funnel cake.  Just ask my Grandma, she loves them too.  She can also sniff out a funnel cake from miles away.  She's a good person to take with you to the fair.

Anyway, back to foods on a stick.  One of my favorite foods on a stick are corn dogs.  Hot dogs are great, but wrap that sucker in some batter and fry it and I'm sold.  However, making corn dogs at home is not easy.  First of all, I don't have a ginormous fryer.  Second, I think it's hard.  That might not be true because I've never tried it.  I have, however, made these little mini corn dog muffins and they are just as good - maybe better.
I think these are as good as corn dogs for numerous reasons:
  1. These are basically cornbread muffins with sausage inside so they taste like corn dogs.
  2. You can dip them in mustard or ketchup just like corn dogs and things that can be dipped in mustard or ketchup are delicious

I think they might be better than real corn dogs for numerous reasons:
  1. You can eat more then 1 of them.  They're mini, so you're required to at least 4 of them.
  2. There is a little smokie sausage inside of them instead of a hot dog which gives them a more sophisticated flavor.  Sophisticated is probably not the right word to describe a processed meat product but there is a more interesting flavor in the little sausage than there is in a regular hot dog.
  3. You don't have to have a ginormous fryer, just a mini muffin pan.
  4. They're not hard to make.
I took these little guys to the same baby shower I took the mini pies to and people ate every single one them.  I got many compliments including from the mother to be.

A couple of years ago, I served these with hot dogs in them instead of the sausages at my nephew's birthday party and the little people loved them as did the adults.


So there you have it.  People love these... small people, full sized people and full sized people who are growing small people.  That's pretty much everyone.

Mini Corn Dog Muffins
Adapted from In Sock Monkey Slippers
Makes 24 mini muffins

Ingredients
1/2 cup All-Purpose Flour
1/2 cup Yellow Cornmeal
2 1/2 T Sugar
1 tsp Baking Powder
1/2 tsp Salt
1/4 tsp Baking Soda
1 Egg
3/4 cup Buttermilk
3 T Plain Greek Yogurt
1 cup frozen Corn Kernels
12 Little Smokies or 4 Hot Dogs
Ketchup and/or Mustard for serving

Instructions
Preheat oven to 425° F. Spray a mini muffin pan with non-stick spray.

 In a large bowl, combine the dry ingredients; flour, cornmeal, sugar, baking powder, salt, and baking soda.

In a medium bowl, combine the wet ingredients; egg, buttermilk, and Greek yogurt. Mix well. Once the wet ingredients are combined, add the corn kernels and stir.

Add the buttermilk mixture to the flour mixture and stir till just incorporated being careful to not overmix. Spoon the batter into the muffin cups, filling the cups 3/4 full.

Slice each little smokie in half (or cut each of the hot dogs into 6 pieces) Place a smokie or hot dog piece in the center of each muffin cup.

Place the muffin pan into the oven. Bake for 10 to 15 minutes until the the tops turn golden and toothpick inserted into the muffin comes out clean. Carefully remove the corn dog muffins from the muffin cups and place on a cooling rack to cool.

Serve with ketchup and mustard or your favorite corn dog topping.

Enjoy!
Julie

Thursday, February 6, 2014

Raspberry Nutella Mini Pies

There are so many things I enjoy about these little pies.
  • I love pie crust
  • I love Nutella
  • I love Nutella with berries
  • I love things in miniature
Pie + Nutella + Berries + Mini = Delicious


These are super easy to make.  Everything in them comes straight from a jar - but that doesn't make them any less delicious.  The original recipe calls for Nutella and Strawberry Jam and I've made these using that flavor of jam before which is delicious.  However, I had a jar of Raspberry Jam already open so I used that instead.  It was also delicious!

This recipe is even easier if you're a cheater and you use store bought pie crust.  I did not do that because I'm thoroughly obsessed with my favorite pie crust recipe and making pie crust is really easy.  I always have butter, flour, sugar and vodka in my house so there's never a need to make a trip to the grocery store.  You don't even technically need the vodka but if you don't have vodka in your house we probably shouldn't be friends.

The hardest part of this whole thing is making sure that you seal the edges of the pies really well.  If you don't, the jam will creep out while they are baking (as you can see from one of my mini pies above).  That defeats the whole purpose of Raspberry Nutella pies and you get Nutella pies... which is not a bad thing, just not what you intended.  I use egg wash, pinch the edges with my fingers and also crimp them with a fork to try and be sure that the edges stick together.  This is also why I used a circle cutter and fold it in half because that leaves one less side for me to worry about.

These are fabulous and easy and people love them.  Besides the fact that they have Nutella in them and they're pies and they're mini, I love that they are sprinkled with a little bit of course sugar before baking which makes them a little bit crunchy. 

I brought them to a baby shower and people gobbled them up.  They're great to serve for a "stand up" party because people can grab one and eat it with no utensils required.  A pie in one hand and a glass of wine in the other is all you really need.  Unless of you course you want a pie in each hand.  That works too.

Raspberry Nutella Mini Pies
Adapted from The Domestic Rebel
Makes approximately 20 pies

Ingredients
1 recipe single Pie Crust Dough (refrigerated is fine or you can use my favorite recipe)
1/4 cup Raspberry Jam (strawberry is great too!)
1/4 cup Nutella
1 Egg
Course Sugar, for sprinkling

Instructions
Preheat the oven to 350 degrees.  Line a baking sheet with a silpat or spray with non-stick cooking spray.
 
Whisk the egg in a small bowl.
 
On a clean, flat work space, roll out the pie dough. Using a 4" circle cutter, cut out rounds of dough. Spoon 1/2 tsp of the Jam and 1/2 tsp of Nutella in the center of each of the circles.  (Collect the scraps and re-roll them to make more pies.)
 
Brush the edges of the circles with the egg.  Fold in half and pinch the edges to seal (you want to try and seal them really well so the filling doesn't seep out when they are baked). Use a small-tined fork to crimp the edges.

Place the sealed pies on the prepared baking sheet.  Brush the tops with the egg.  Sprinkle with coarse sugar.

Bake at 350 degrees for 15-20 minutes until the tops are golden and the edges are lightly crispy.  Cool the pies on the baking sheet slightly before serving (they're also great a room temperature).
 
Enjoy!
Julie

Wednesday, February 5, 2014

PB Thai Noodle Stir Fry

I started eating PB2 about a year ago.  I'm a big peanut butter fan and while it's not necessarily bad for you it is pretty high in calories.  PB2 has a lot less calories but it's definitely fake.  I'm not sure exactly what they do to the peanuts to turn them into a powdered, lower calorie form but this stuff satisfies my peanut butter cravings.  I might die a year earlier but I'm OK with that - if the amount of butter I consume doesn't kill me before everything else I've decided the significantly smaller amounts of this stuff that I eat won't do it. (PS - the FDA says it is fine.  I totally trust them.)


As I was taking inventory of my pantry to see what needed to be eaten, I discovered that I had 3 jars of PB2 in there.  Apparently, on a couple of occasions, I believed I was running out of the stuff and bought more.  Then I forgot and bought even more.  That put PB2 squarely on my list of things I need to get rid of. I'd seen a couple of recipes using PB2 in stir fries and figured I'd give it a go (I typically just eat it on toast and I've found one recipe that uses it to make this individual chocolate peanut butter mug cake which I'm totally obsessed with).


The sauce has loads of yummy stuff in it - ginger, garlic, vegetable broth, soy sauce, sriracha, agave, pepper and PB2.  All that just gets stirred together to make a spicy, peanut buttery, Asian flavored sauce. 


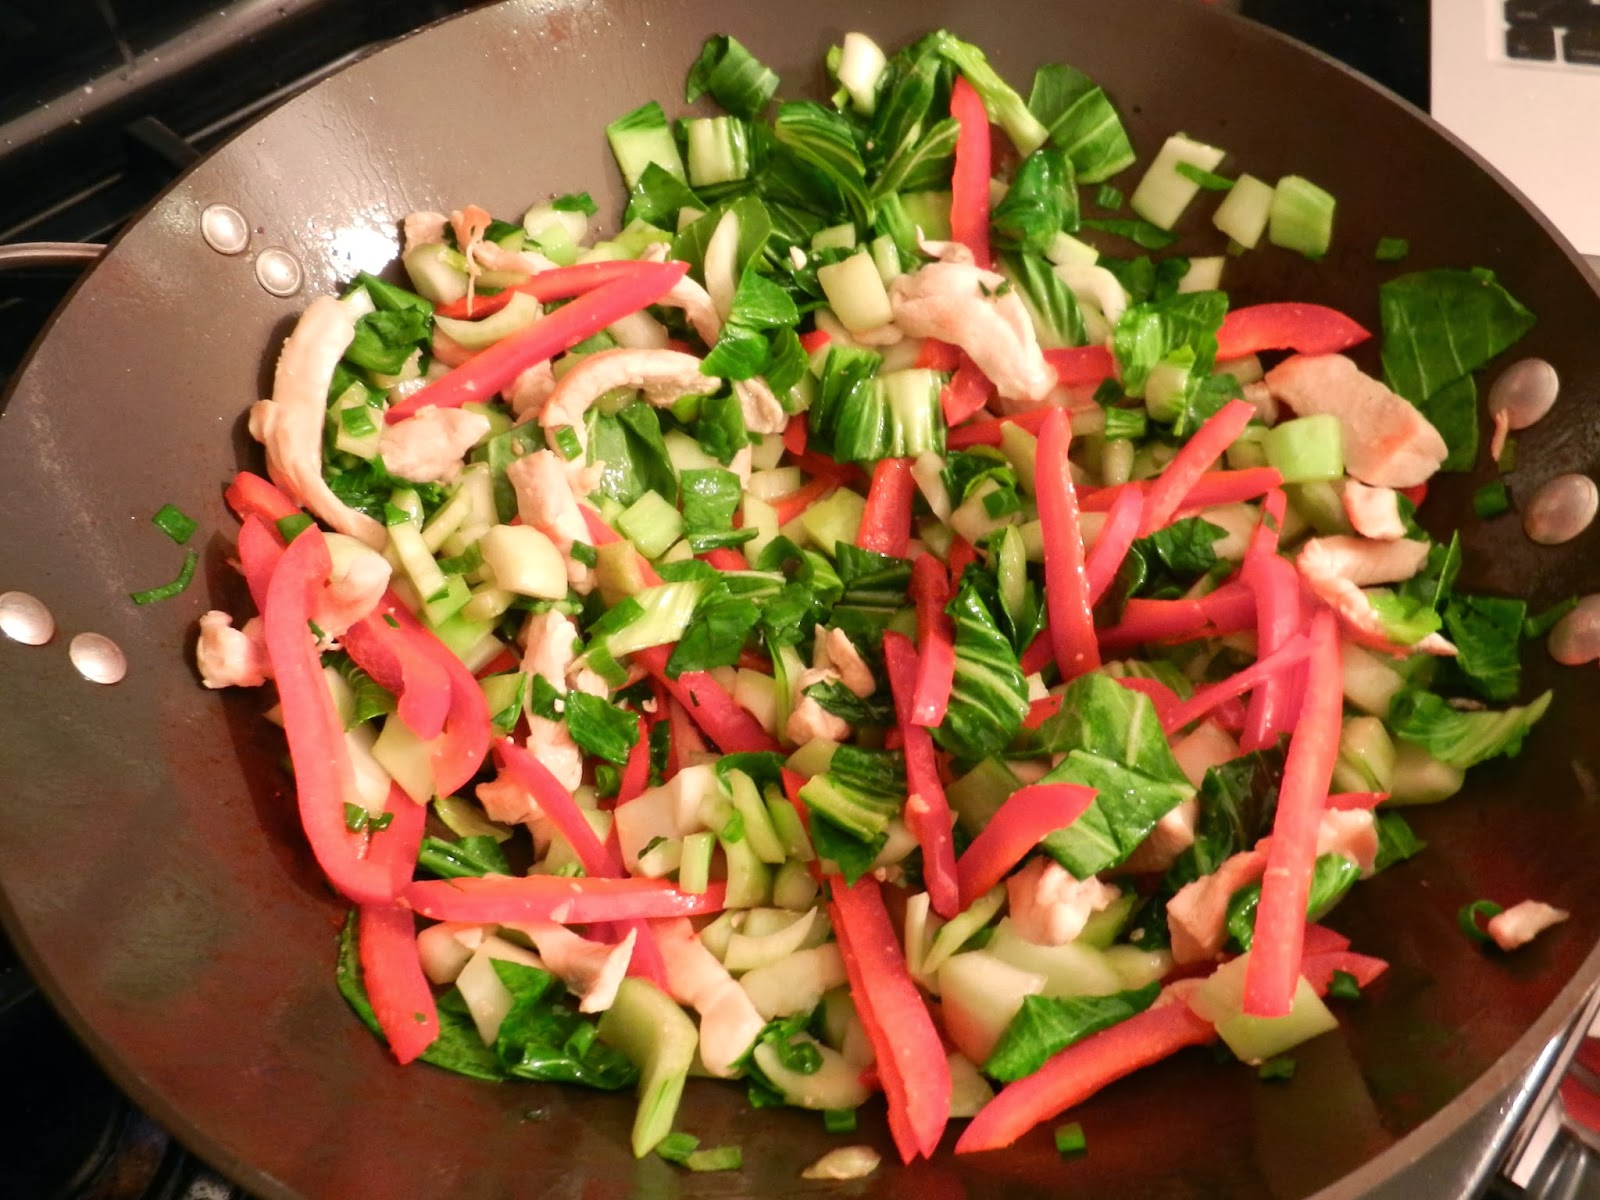
For the base of my stir fry I went with a few things that I had hanging around my house - chicken, bean sprouts and noodles.  To that I added a bunch of vegetables... bok choy, green onions and red peppers.  I make it a goal to put as many veggies as possible into my stir fry so that I can eat as much of it as I want and not feel guilty.


Once all the veggies are cooked up, in go the noodles and the sauce which cooks for a while to thicken up and coat all the veggies and noodles.


I'm a huge fan of this recipe and will definitely make this sauce again with any number of stir fry veggie combinations.  I usually have all this stuff in my pantry anyway.  I love the combination of the creamy peanut butter and the spicy flavors.  Good thing because I'll have to make this at least four more times to rid myself of all the stock in my pantry.

PB Thai Noodle Stir Fry
Adapted from Key Ingredient

Ingredients

2 T minced Ginger
2 cloves Garlic, mined
1/2 cup PB2 (if you don't have PB2, you can substitute regular peanut butter, just eliminate the 1/4 cup of water)
1/4 cup Water
1 cup Vegetable or Chicken Broth
3 T Soy Sauce or Tamari

2 T Sriracha
1 T Agave
1/4 tsp Pepper
2 T Olive Oil
10 oz. Boneless, Skinless Chicken Breasts, thinly sliced
1 lb Baby Bok Choy, chopped
1 Red Pepper, thinly sliced
1/2 cup sliced Green Onions
14 oz. can Bean Sprouts, drained
1/4 cup chopped Cilantro
7 oz. Hokkien Stir Fry Noodles (or cooked spaghetti)

Instructions
In a small bowl combine the ginger, garlic, PB2, water, broth, soy sauce, sriracha, agave and pepper.  Set aside.

Heat the oil in a wok over high heat.  Add the chicken and cook until browned, 3-4 minutes.  Add the bok choy, red pepper and green onions.  Saute until soft, about 5 minutes.  Add the sprouts and saute until hot, about 1 minute.  Add the noodles and sauce and cook until reduce and thick, about 10 minutes.  Stir in the cilantro and serve.

Enjoy!
Julie