Showing posts with label Savory. Show all posts

Wednesday, April 30, 2014

Lemon Thyme Roast Chicken

I'll keep this post short and sweet.

I read quite a few blogs on a daily basis.  Most of them make me feel like my blog is awkward and doesn't look nearly as nice as other blogs.  I use a standard design from Blogger and have only done a little bit of customization.  I've had thoughts of paying someone to design this space into something that looks more professional but haven't gotten there yet.

Looks aside (although her blog looks totally legit) I've been loving the recipes that are posted on The View From Great Island lately.  I can't remember how I stumbled on this blog but I've been really enjoying it.  (BTW, I don't know this lady at all and she doesn't know me so there's no particular reason for me to be telling you about her blog except that I like it and I got this recipe from her).


This roasted chicken is super simple to make and tastes awesome!  I served it to my book club ladies and was really happy with how it came out.  The lemon flavor is bright and fresh but it gets a little bit of a concentrated, richer flavor from being roasted.


You can find the recipe HERE.  The original recipe calls for a whole chicken that has been cut up, but I used all chicken legs.  I also removed the skin before cooking them to pump up the healthy factor.  Oh yeah, and I cheated and used regular lemons and not meyer lemons because my grocery store didn't have them.  I'm practical that way.

Enjoy!
Julie

Sunday, April 27, 2014

Baking Bouchon - Recipe 98: Cheese Puffs

This recipe marks the end of the puffy things chapter.  If I had my cookbook, I could figure out what the chapter is really called, but whatever it is, it is coming to a close on a savory note.

CA was really excited about this recipe.  I think I've been overloading him on sweets and the poor man needed some relief from his sugar coma.  Plus, my superhero is partial to anything that includes cheese.
The dough for the cheese puffs is made in the same way it made for the cream puffs and eclairs - butter is melted with water, cooked with flour and whipped with eggs.  Then comes the grated Gruyere cheese which makes these into cheese puffs.  There is also a good amount of pepper in batter which adds to the savory notes.
The dough gets piped onto a sheet pan and baked until they magically puff in the oven.  Every time I made Pate a Choux (the fancy name for the puffy dough) I'm surprised that it actually puffs when it's baked.


These are pretty darn good and completely addicting.  I made them as an appetizer for CA and I one night and had to hide them from myself to ensure I could actually eat dinner.


Looking back at the recipes in this chapter, I have a really hard time choosing a favorite - they're all pretty awesome.

- The Cream Puffs were super light and tasty
- The Eclairs - including the chocolate, coconut lime and dulce de leche versions were all fantastic.
- Paris-New York which was filled with peanut butter pastry cream was simply out of control.

This may have been the most consistently good chapter in the cookbook.

Enjoy!
Julie

Tuesday, February 25, 2014

Smoky Ketchup

It's hard for me to call this a recipe because it's just mixing three things together but I got a lot of complements when I served this with the Mini Corn Dog Muffins.  I made it again to serve with a batch of parsnip fries and figured I'd take a couple of photos and tell you about it.


I'm really into ketchup so I'm obviously really into kicking ketchup up a notch in the easiest possible way.

I first had this in a restaurant that always serves smoky ketchup with their french fries and once I had it I couldn't go to that restaurant without having french fries because I wanted the smoky ketchup.  I ended up asking what was in it and they told me the secret - Chipotle Peppers in Adobo Sauce.


The smoky ketchup in the restaurant was completely smooth so they either only used the sauce from the can of peppers or they blended it all up until it was smooth.  Either way, I like to mix in both the sauce and the chopped peppers into the ketchup to give it a really spicy and smoky flavor and a little bit of texture.


While this stuff is definitely great on French Fries, I love it on a lot of foods - Parsnip Fries, Hash Browns, Burgers - pretty much anything you'd put ketchup on will be infinitely better with smoky ketchup.

Smoky Ketchup

Ingredients
1/2 cup Ketchup
4 T Sauce from Chipotle Peppers in Adobo Sauce
2 Chipotle Peppers in Adobo Sauce, finely chopped

Instructions
Mix all of the ingredients together.

I told you it was easy.

Enjoy!
Julie

Monday, February 10, 2014

Dijon, Ham and Asparagus Roll Ups

I bring you another easy to put together dish that is a great appetizer or brunch food.

You may be expecting these to just be asparagus and ham rolled up together with some mustard, but you'd be wrong.  These are asparagus and ham roll up in crescent rolls with mustard on them.


Why do Pillsbury Crescent Rolls taste so good?  I tried to make my own once and they just aren't the same.  Is it the preservatives?  Do they use a ton of butter?  Maybe it's that little dough boy who, let's be honest, is a little bit creepy.  He has a human face, giggles like a kid but yet we find it appropriate to want to bake and eat him.  Whatever it is, I don't buy them unless they are for a specific purpose because if they are in front of me I'll eat the whole popping can.  Just like Grands Biscuits and those canned Cinnamon Rolls with the little can of icing.  I can't resist those either.


Making this recipe is super easy and is more about assembly than it is about cooking.

Step 1: Pop open the can of crescent rolls and lay them out.   I love opening those things.  I wish more stuff was packaged like this.  It's almost a little bit scary because you don't know exactly when it's going to pop.  Will it pop when you take the outside paper off?  Do you need to press lightly or will you have to press really hard.  You never know and then suddenly it's open and it always surprises me just a little bit.  It's like opening champagne.

Step 2: Spread each crescent roll with Dijon mustard.  I've made these a couple of times and I say the more mustard the better.  If you only spread a thin layer on there you won't get any of the flavor in the finished dish.  Mustard it up.

Step 3: Wrap a par-cooked asparagus spear in ham.  I like to use 2 slices of very thinly sliced ham so you get the ham flavor but you're not trying to chew through a thick slice of ham.  No one wants to be trying to daintily eating something at a party only to have to gnaw on some big old ham slice.

Step 4:  Put the hammy asparagus on the mustardy crescent roll dough and roll that puppy up.

Step 5: Bake.

Step 6: Try to eat just one.


I really love these.  You get a great combination of the bitter asparagus, spicy mustard, sweet ham and warm and buttery crescent roll.  It's kind of like serving a sandwich but so much better.  They are great brunch of appetizer food because people think they're eating vegetables (which they are) but they're really eating hammy, doughy deliciousness which is what they really want anyway.  Trust me.

Dijon, Ham and Asparagus Roll Ups

Adapted from The Daily Meal
Makes 16 Roll Ups

Ingredients 
16 stalks Asparagus
2 packages Crescent Rolls 
Dijon Mustard
16 slices Ham (or 32 if they're really thinly sliced)


Instructions
Preheat the oven to 375 degrees.

Break off the woody parts of the asparagus stem so that only about the top 3-3 ½ inches of the stalk remain. Place the asparagus in a microwavable bowl with just enough water to cover. Then, place a towel over the top of the bowl. Microwave for 2 minutes or until tender.

Spread out the crescent roll dough evenly on a large baking sheet. Coat the dough with a generous layer of Dijon mustard. Wrap 1 asparagus stalk in 1-2 slices of ham. Place the wrapped asparagus at the wide end of the crescent dough and roll up in the dough. Repeat for each crescent roll.

Bake until golden brown, about 12-15 minutes. Remove from the oven, let cool slightly, and serve warm.

Enjoy!
Julie

Sunday, February 9, 2014

Mini Corn Dog Muffins

Don't you just love fair food?  Pretty much any time I go to a fair or carnival or amusement park, I eat way too much food and all of it is really bad for me and then I feel nauseous.  Maybe it's that there is an abundance of foods on a stick which are so much better than foods not on a stick.  Or maybe it's because I eat a lot of food and then ride those crazy carni rides.

The only fair food that I absolutely love that is not on a stick are funnel cakes which are a whole category to themselves.  Nothing beats a funnel cake.  Just ask my Grandma, she loves them too.  She can also sniff out a funnel cake from miles away.  She's a good person to take with you to the fair.

Anyway, back to foods on a stick.  One of my favorite foods on a stick are corn dogs.  Hot dogs are great, but wrap that sucker in some batter and fry it and I'm sold.  However, making corn dogs at home is not easy.  First of all, I don't have a ginormous fryer.  Second, I think it's hard.  That might not be true because I've never tried it.  I have, however, made these little mini corn dog muffins and they are just as good - maybe better.
I think these are as good as corn dogs for numerous reasons:
  1. These are basically cornbread muffins with sausage inside so they taste like corn dogs.
  2. You can dip them in mustard or ketchup just like corn dogs and things that can be dipped in mustard or ketchup are delicious

I think they might be better than real corn dogs for numerous reasons:
  1. You can eat more then 1 of them.  They're mini, so you're required to at least 4 of them.
  2. There is a little smokie sausage inside of them instead of a hot dog which gives them a more sophisticated flavor.  Sophisticated is probably not the right word to describe a processed meat product but there is a more interesting flavor in the little sausage than there is in a regular hot dog.
  3. You don't have to have a ginormous fryer, just a mini muffin pan.
  4. They're not hard to make.
I took these little guys to the same baby shower I took the mini pies to and people ate every single one them.  I got many compliments including from the mother to be.

A couple of years ago, I served these with hot dogs in them instead of the sausages at my nephew's birthday party and the little people loved them as did the adults.


So there you have it.  People love these... small people, full sized people and full sized people who are growing small people.  That's pretty much everyone.

Mini Corn Dog Muffins
Adapted from In Sock Monkey Slippers
Makes 24 mini muffins

Ingredients
1/2 cup All-Purpose Flour
1/2 cup Yellow Cornmeal
2 1/2 T Sugar
1 tsp Baking Powder
1/2 tsp Salt
1/4 tsp Baking Soda
1 Egg
3/4 cup Buttermilk
3 T Plain Greek Yogurt
1 cup frozen Corn Kernels
12 Little Smokies or 4 Hot Dogs
Ketchup and/or Mustard for serving

Instructions
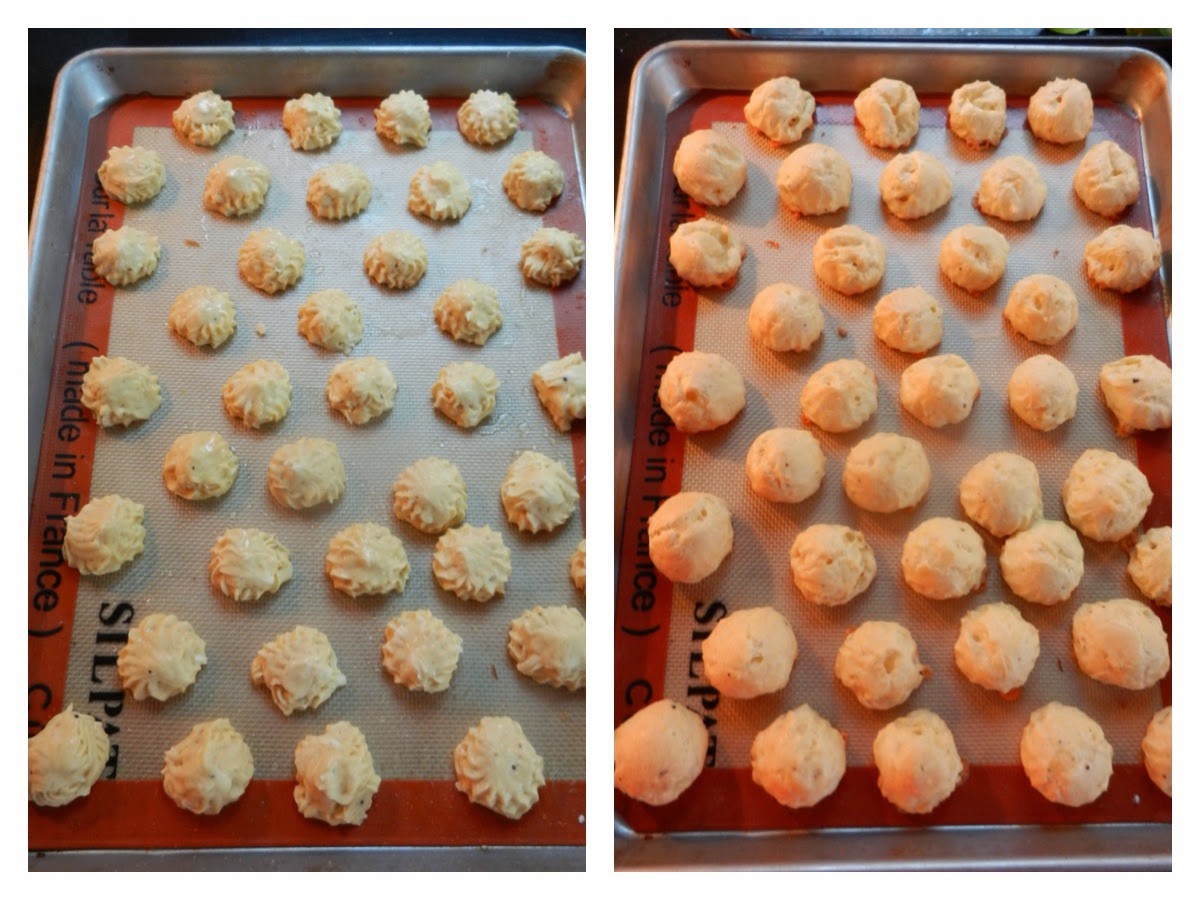
Preheat oven to 425° F. Spray a mini muffin pan with non-stick spray.

 In a large bowl, combine the dry ingredients; flour, cornmeal, sugar, baking powder, salt, and baking soda.

In a medium bowl, combine the wet ingredients; egg, buttermilk, and Greek yogurt. Mix well. Once the wet ingredients are combined, add the corn kernels and stir.

Add the buttermilk mixture to the flour mixture and stir till just incorporated being careful to not overmix. Spoon the batter into the muffin cups, filling the cups 3/4 full.

Slice each little smokie in half (or cut each of the hot dogs into 6 pieces) Place a smokie or hot dog piece in the center of each muffin cup.

Place the muffin pan into the oven. Bake for 10 to 15 minutes until the the tops turn golden and toothpick inserted into the muffin comes out clean. Carefully remove the corn dog muffins from the muffin cups and place on a cooling rack to cool.

Serve with ketchup and mustard or your favorite corn dog topping.

Enjoy!
Julie

Wednesday, February 5, 2014

PB Thai Noodle Stir Fry

I started eating PB2 about a year ago.  I'm a big peanut butter fan and while it's not necessarily bad for you it is pretty high in calories.  PB2 has a lot less calories but it's definitely fake.  I'm not sure exactly what they do to the peanuts to turn them into a powdered, lower calorie form but this stuff satisfies my peanut butter cravings.  I might die a year earlier but I'm OK with that - if the amount of butter I consume doesn't kill me before everything else I've decided the significantly smaller amounts of this stuff that I eat won't do it. (PS - the FDA says it is fine.  I totally trust them.)


As I was taking inventory of my pantry to see what needed to be eaten, I discovered that I had 3 jars of PB2 in there.  Apparently, on a couple of occasions, I believed I was running out of the stuff and bought more.  Then I forgot and bought even more.  That put PB2 squarely on my list of things I need to get rid of. I'd seen a couple of recipes using PB2 in stir fries and figured I'd give it a go (I typically just eat it on toast and I've found one recipe that uses it to make this individual chocolate peanut butter mug cake which I'm totally obsessed with).


The sauce has loads of yummy stuff in it - ginger, garlic, vegetable broth, soy sauce, sriracha, agave, pepper and PB2.  All that just gets stirred together to make a spicy, peanut buttery, Asian flavored sauce. 


For the base of my stir fry I went with a few things that I had hanging around my house - chicken, bean sprouts and noodles.  To that I added a bunch of vegetables... bok choy, green onions and red peppers.  I make it a goal to put as many veggies as possible into my stir fry so that I can eat as much of it as I want and not feel guilty.


Once all the veggies are cooked up, in go the noodles and the sauce which cooks for a while to thicken up and coat all the veggies and noodles.


I'm a huge fan of this recipe and will definitely make this sauce again with any number of stir fry veggie combinations.  I usually have all this stuff in my pantry anyway.  I love the combination of the creamy peanut butter and the spicy flavors.  Good thing because I'll have to make this at least four more times to rid myself of all the stock in my pantry.

PB Thai Noodle Stir Fry
Adapted from Key Ingredient

Ingredients

2 T minced Ginger
2 cloves Garlic, mined
1/2 cup PB2 (if you don't have PB2, you can substitute regular peanut butter, just eliminate the 1/4 cup of water)
1/4 cup Water
1 cup Vegetable or Chicken Broth
3 T Soy Sauce or Tamari

2 T Sriracha
1 T Agave
1/4 tsp Pepper
2 T Olive Oil
10 oz. Boneless, Skinless Chicken Breasts, thinly sliced
1 lb Baby Bok Choy, chopped
1 Red Pepper, thinly sliced
1/2 cup sliced Green Onions
14 oz. can Bean Sprouts, drained
1/4 cup chopped Cilantro
7 oz. Hokkien Stir Fry Noodles (or cooked spaghetti)

Instructions
In a small bowl combine the ginger, garlic, PB2, water, broth, soy sauce, sriracha, agave and pepper.  Set aside.

Heat the oil in a wok over high heat.  Add the chicken and cook until browned, 3-4 minutes.  Add the bok choy, red pepper and green onions.  Saute until soft, about 5 minutes.  Add the sprouts and saute until hot, about 1 minute.  Add the noodles and sauce and cook until reduce and thick, about 10 minutes.  Stir in the cilantro and serve.

Enjoy!
Julie

Tuesday, January 28, 2014

Pepper Jelly Salmon

Once a jar of pepper jelly is opened it must be used.  I used a few tablespoons of the jar in my Pepper Jelly Brie En Croute which was absolutely delicious, but this jar is large and must be tackled.  Therefore, I give you Pepper Jelly Salmon.


This recipe is pretty simple and if you've got pepper jelly and salmon filets you've probably got everything else you'll need hanging around your house - olive oil, garlic, vinegar, soy sauce, salt & pepper.


Making the sauce is simple - saute minced ginger and garlic in a pan.  Add vinegar, soy sauce and pepper jelly and simmer a while to reduce the sauce.  Brush that on some seared salmon filets pop it in the oven for a few minutes.  Done.

What you want to try not to do is turn the heat up to high on the sauce to get it to reduce even further, walk away and get distracted by what's on TV and come back to find a blackened, thick disaster that you cannot use as extra sauce for serving.  Don't do that.


This dished turned out pretty well (minus my burnt sauce)  The pepper jelly and soy sauce combo give it a sweet and sour kind of flavor with a little bit of a spicy kick.  It's a great weeknight main dish that doesn't take a lot of time, effort or calories.  That's what I appreciate on a Tuesday.

Of course, I still have pepper jelly left so I need to find another use for it.  Cleaning out my pantry is hard work.

Pepper Jelly Salmon
Adapted from Fort Mill SC Living
Serves 2

Ingredients
2 T Olive Oil (divided)
1 T minced Ginger
1 Clove Garlic, minced
1/4 cup Vinegar (I used apple cider but rice vinegar would be great)
1/4 cup Soy Sauce (Tamari for GF)
1/4 cup + 2 T Pepper Jelly
2 Salmon Filets
Salt & Pepper

Instructions
Heat 1 T olive oil in a small pan over medium heat.  Add the ginger and garlic and saute for 2 minutes.  Add the vinegar, soy sauce and pepper jelly.  Bring to a boil and reduce the heat to love for 20 minutes or until thickened.

Preheat the oven to 375 degrees.  Heat remaining 1 T olive oil in an oven-safe skillet over medium heat.  Add the salmon filets, skin side up and cook for 4 minutes.  Flip skin side down.  Brush the tops with the sauce.  Place into the preheated oven and cook for 10 minutes.

Spoon the remaining sauce over the filets for serving.

Enjoy!
Julie

Monday, January 27, 2014

Creamed Spinach

I love it when I'm eating something and it feels like it's bad for me but it's not.  This side dish is packed with spinach which we all know is good for us but it's creamy and salty and makes you feel a little bit bad

CA took one bite and looked at me like I'd fed him chocolate cake for dinner (that's never happened - when I eat cake for dinner I tell him I'm not making dinner and he has to find his own food.  If he chooses to also eat cake it's not because I served it to him). 

I looked at him like "What?" 

"This is really decadent."

"It's spinach."

"I know but it's really creamy."

"That's because there's cheese in it."

"I know but why is it so creamy."

"and Fat Free Sour Cream."

"Huh.  This is really good.  You should make this again."

"OK."

We have the most exciting dinner conversations.


This takes all of 10 minutes to throw together which is fantastic and besides the giant tub of spinach, I always have everything else hanging around the house.


The onions get sauteed for a few minutes until soft, then the garlic goes in followed by the spinach. 

The best thing about spinach is that it cooks so fast - it wilts completely in approximately 2-3 minutes.  The worst thing about spinach is that you start off with this seemingly huge amount of food and end up with a very small amount of food.  CA and I can polish off an entire box of spinach in one sitting, provided it's been cooked.

After the spinach cooks, season with salt and pepper, add some Parmesan cheese and a little bit of sour cream and you're done.


Obviously this was a big hit in our house and I'll be repeating this performance many times because it was so darn good.  Just call me Popeye.
 
Creamed Spinach
4 servings

Ingredients
 2 T Olive Oil
2 cloves Garlic, minced
1/4 cup finely chopped Onion
 1/4 tsp Salt
1/4 tsp Pepper

10 oz. Spinach
1/2 cup grated Parmesan Cheese
 2 T Sour Cream

Instructions
Heat oil in a large non-stick skillet over medium heat.  Add the onion and cook until soft, about 5 minutes.  Add the garlic and cook for 1 minute.  Add the spinach (you may have to add it in a little bit at a time if it doesn't all fit in your skillet) and saute until wilted.  Season with salt and pepper.  Add the cheese and sour cream and stir until the cheese is melted, about 2 minutes.  Check the taste and add more salt if desired.

Enjoy!
Julie

Thursday, January 23, 2014

Cheesy Garlic Potato Gratin

Sometimes you just need a cheesy potato and if it's loaded with garlic, that's even better.


Any time I'm looking for a classic recipe, I turn to my Better Homes and Gardens Cookbook.   It's really the best when you want something that your grandma used to make or you don't want a twist on the original - you just want the original.  I eat a lot of weird stuff but the classics are classics for a reason.


It takes much longer to bake this recipe than it does to prepare it.  It's really just about slicing, mincing and shredding.

Potatoes get thinly sliced.

Leeks get thinly sliced.

Garlic gets minced.

Cheese gets shredded.

All that gets layered up in a dish, doused in some milk and baked.


The result looks much better than the photo below would indicate (I don't know what happened - it looks burnt but it wasn't.  I was in a hurry and the lighting was terrible).  It is creamy and salty and cheesy and garlicy - it's really quite perfect.  Warm, satisfying and it perfectly matches the picture in your head when you think of cheesy potatoes.

Cheesy Garlic Potato Gratin
Adapted from Better Homes and Gardens

Ingredients
4 medium Yukon Gold or other Yellow Potato (about 1 1/2 lbs), thinly sliced
1/3 cup sliced Leeks
4 cloves Garlic, minced
1 tsp Salt
1/4 tsp Pepper
1 1/2 cups shredded Gruyere
1 cup Whole Milk

Instructions
Preheat the oven to 350 degrees.  Spray a 2 quart baking dish with non-stick cooking spray.

Layer half of the potatoes in an even layer in the prepared dish.  Sprinkle with half the leeks, garlic, salt, pepper and cheese.  Layer the other half of the potatoes on top and sprinkle with the remaining leeks, garlic, salt, pepper and cheese.  Pour the milk over the top.

Bake, covered with aluminim foil for 70 minutes.  Uncover and bake an additional 20-30 minutes or until the potatoes are tender and the top if golden brown.

Let stand at room temperature for 10 minutes before serving.

Enjoy!
Julie

Monday, January 20, 2014

Pepper Jelly Brie En Croute

Do you know how hard it is to use an entire jar of pepper jelly?  I was pumped about making this recipe because I figured I'd use up both the sliced almonds and pepper jelly in my pantry but alas, I only used up a little bit of each so I'm not any better off than I was yesterday in the "less crap in my pantry" department.  Oh well.


I made this for CA and I to share on New Year's Eve.  We were being super lame and stayed in that night since we were still recovering from the previous holiday.   He made Beef Wellington which also uses puff pastry and resulted in me sprawled out on the couch in a butter coma.  It was also freakin' delicious but I was too busy making brie and side dishes and dessert (which you'll hear about soon) to pay attention to what he was doing.  If you know him you can ask him how he did it but he refuses to write down the recipe mash-up for me.

I'm a big fan of brie wrapped in puff pastry.  Who wouldn't love melty cheese wrapped in buttery pastry?  I was excited to see that our grocery store had small portions of brie because CA and I couldn't shouldn't eat an entire wheel of cheese by ourselves.


All previous times I've had Brie En Croute (I don't like the name of this because it sounds too snobby - I wish there was another way to say cheese wrapped in pastry dough that sounded less pretentious) it's had some kind of sweet jam hiding inside the dough with the cheese.  I've always liked it but while looking through my pantry for something to spread on this cheese, I spotted the pepper jelly and knew it would be perfect! 


In addition to the cheese and the pepper jelly, I added a little bit of crunch with some sliced almonds.  All of that gets wrapped up in some puff pastry.  We went the store bought route for the puff pastry as all the homemade puff pastry in the freezer is destined for the last few Bouchon Bakery recipes.  This stuff performed better than my homemade version which is frustrating considering how much work it takes to make it.
CA and I were both huge fans of this variation.  The brie is gooey and melty.   The almonds are nutty and crunchy.  The pepper jelly is also melty and gooey but spicy too which is what I think really makes this an interesting appetizer.

Unfortunately, I still have a lot of pepper jelly to deal with but if it means making this 10 times I'm OK with that.


Pepper Jelly Brie En Croute

Ingredients
1/4 sheet Puff Pastry
4 oz. Brie
2 T Pepper Jelly
2 T Almonds
1 Egg

Instructions
Roll the puff pastry out to a 5" by 10" rectangle.  Place the cheese in the center of the puff pastry.  Top with pepper jelly and almonds. 

Place the egg in a small bowl and whisk to a uniform consistency.

Brush the edges of the puff pastry with the egg.  Wrap the cheese in the pastry ensuring that the cheese is completely enclosed in the dough.

Place the wrapped cheese on a baking sheet, seam side down and brush the entire top with the egg.  Cut a few slits in the top of the dough to allow steam to escape.

Bake at 400 degrees for 25 minutes until the pastry is golden brown and set.

Enjoy!
Julie

Wednesday, January 1, 2014

Nordic Winter Vegetable Soup

Nothing warms you up like soup.  I dislike eating soup in the summer because it makes me sweaty.  I do, however, get cold really easily and eating soup helps me avoid wearing gloves indoors in the winter.

I pulled this recipe out of Food & Wine magazine a couple of years ago and when CA said he wanted soup for dinner, I resurrected it.  I was home all day doing other things in the kitchen like making desserts and bread and more desserts so sticking a pot of soup on the stove was really easy.  Plus, I was excited to use a new ingredient.
This funky lookin' veg is celery root.  Celery root or Celeriac is a root vegetable in the celery family but it's not just the root of regular celery which is what I thought it was until this very minute when I looked it up on wikipedia.  Apparently this stuff grows wild in Northern Europe, hence "Nordic" soup but you have to go to fancy grocery stores to get it in the US... at least I did.  When you peel it, it smells exactly like regular celery and it tastes like it too, except without the stingy texture which is what I some people dislike about raw celery.
The original recipe uses celery root and parsnips which would have made this a very white dish (minus the spinach)... celery root, parsnips and barley all lack any sort of pigment.  However, my fancy grocery store was fresh out of parsnips and I refused to go to another store so a pop of orange carrots was in order.


I really enjoyed this soup!  I like that it's vegetarian, which CA and I try to do a couple of times per week - but it's still very filling.  The barley is super hearty and won't leave you starving 30 minutes later.  The celery root has a great celery flavor while giving the soup more substance than traditional celery would.  The onions and leeks add great flavor and I'm an all around fan of wilted spinach in my soup.  The thyme made CA ask why it smelled like Thanksgiving in the house and while I typically shy away from putting nutmeg in savory dishes, I went ahead and did it (although I cut the amount in half) which I think added just the tiniest bit of a warm spice to the soup.  This was the perfect meal for a cold winter night when I was too busy to worry about making something at the last minute.


Nordic Winter Vegetable Soup
Recipe from Food & Wine

Ingredients
2 T Olive Oil
1 Large Onion, thinly sliced
2 Leeks, white and tender green parts only, thinly sliced
2 Garlic Cloves, minced
1 cup Pearled Barley
8 cups Vegetable Broth
4 cups Water
10 Thyme Sprigs
2 Bay Leaves
1 1/2 lbs. Celery Root, peeled and cut into 1/2 inch cubes
1 lb Parsnips or Carrots, peeled and cut into 1/2 inch pieces
1 lb. Baby Spinach
1/2 tsp Nutmeg
Salt
Pepper

Instructions
 In a large pot, heat the oil. Add the onion, leeks and garlic and cook over moderate heat, stirring occasionally, until tender, about 5 minutes. Stir in the barley. Add the vegetable broth, water, thyme and bay leaves and bring to a boil. Add the celery root and parsnips or carrots and season with salt and pepper. Simmer over moderately low heat until the barley and root vegetables are tender, about 40 minutes. 
Stir in the spinach and nutmeg and simmer for 5 minutes. Taste the soup and season with salt and pepper as needed.  


Enjoy!
Julie

Tuesday, December 31, 2013

Gnocchi with Mushroom Ragu

Happy New Year!

I swear that 2013 flew by- I'm not entirely sure what happened but I think it was 2012 and then I blinked and it was 2014.  So much has happened this year - particularly in this little blog space.  This is my 210th post.  That's ridiculous considering that I started this thing in February, I'm pretty proud of myself for posting fairly consistently.  I've been able to make some baked goods that I've been wanting to try for years like croissants, doughnuts and macarons. I have loved almost every second of it. Not everything has been delicious and there have been a few disasters... like when I made a Carmel Nut Tart and dropped the crust on the floor and burned my arm and the caramel in the span of 1 minute... or when I made marshmallows eggs and thought silver leaf was silver leaf gelatin.  Good times.  Surprisingly, only one of those posts made it into the top 3 most viewed posts of the year.

#1 by a landslide is Vanilla Macarons - This post has had nearly 1,200 page views which blows my mind!  Macarons are very trendy right now and I'm pretty sure that people are searching for the Bouchon Bakery Vanilla Macaron recipe and click my link in the Google search only to be frustrated that I don't post recipes from the Bouchon Bakery cookbook.  Sorry folks, I enjoy my freedom.

#2 is Oreo Biscotti with almost 600 page views - I'm always shocked with how much people like Oreo Cookies and anything that you put Oreo Cookies in.  This is a pretty great recipe so I don't blame them.

#3 only a handful of page views behind #2 is Crock Pot Turkey Breast - WEIRD! People must really like crock pot recipes.  That or they have every intention of making a crock pot recipe because they are lured in by the convenience and hands off approach but they never actually make it because it gets lost in their Pinterest account hidden by all the Oreo Cookie recipes.

Enough about the past, I now present to you a new recipe for your enjoyment...


I love Gnocchi - I definitely prefer it to regular pasta.  When it's made well it's lighter and fluffier than pasta with all the same benefits of being a vehicle for sauce and cheese.  I found this recipe on the Food & Wine website one Saturday when I was really craving some warm comfort food.  Gnocchi hits the spot every time.
The gnocchi here are very traditional - potatoes combined with eggs, cheese and flour to create a soft dough.  I cheated a little bit and microwaved the potatoes instead of baking them which ended up OK, but I think the texture would have been a bit fluffier if I'd actually followed the directions and baked the potatoes in the oven.  Unfortunately, I didn't have time for that business because I was hungry and adding another hour to prep time wasn't happening.


The dough gets turned out onto a floured surface and kneaded for a few minutes before rolling it into a big long snake.  That gets cut into pieces and pressed with a fork to make little indention on each piece.

The gnocchi get boiled for just a few minutes until they float to the surface of the water.

There is a restaurant in DC called Filomena which my family has been going to for decades and there are these sweet little ladies who stand and make fresh pasta and gnocchi in the window all day.  I admire their stamina because I was tired from making just a few servings of gnocchi.

Oddly enough this restaurant is obsessed with holidays and they decorate for Halloween like nobody's business.  It's really quite horrifying to eat your light, fluffy, delicious gnocchi while being stared at by a clown holding a butcher knife but it's totally worth if because the food is amazing.  I hear they also decorate for Christmas which I'm hopeful is less frightening.  My gnocchi were not nearly as fluffy or perfect as those found in the restaurant but they still quite good - although I wouldn't say they were worth being stared at by a giant spider with evil yellow eyes for two hours.
My favorite part of this dish was the sauce.  I hated mushrooms until a couple of years ago when I ate them until I forced myself to like them and it's dishes like this that make me so glad I did.  The sauce was meaty and hearty and full of flavor but it did not overpower the delicate flavors of the gnocchi.  This sauce is a great way to eat a vegetarian dish where it's so hearty you don't miss the meat at all.  I definitely plan to make the sauce again, even if I don't have time to make fresh gnocchi - it would be great over pasta or rice or a grilled chicken breast.  I really enjoyed it!

CA really liked this dish too - he wasn't entirely excited about having gnocchi for dinner as he wasn't "feelin' it" but he totally recanted his statement when he tried it.


Gnocchi with Mushroom Ragu
Recipe courtesy of Food & Wine
8 Servings

Ingredients

For the Gnocchi 
4 Baking Potatoes
2 T Butter, melted
1 Egg, lightly beaten
1 Egg Yolk, lightly beaten
1 1/2 tsp Salt
1/2 tsp Pepper
Pinch of Nutmeg
1/2 cup grated Parmesan Cheese
1 1/4 cups All Purpose Flour

For the Ragu
2 T Butter
1/2 cup Olive Oil
1 1/2 lb mixed Mushrooms (quartered if large) 
1/2 tsp Salt
1/2 tsp Pepper
2 Shallots, minced
2 cloves Garlic, minced
1 tsp Thyme
1/2 cup Dry White Wine
1/4 cup Chicken Stock


Instructions


To Make the Gnocchi
Preheat the oven to 375°.  Bake the potatoes for 1 hour, until tender; let cool slightly. Peel the potatoes and pass them through a ricer into a bowl or mash with a potato masher or fork. Stir in the butter, egg, egg yolk, salt, pepper, nutmeg and 1/2 cup of cheese and let cool.

Lightly dust a baking sheet with flour. Sprinkle the 1 1/4 cups of flour over the potato mixture and gently knead until the flour is almost incorporated. Scrape the dough onto a floured work surface and gently knead until smooth. Divide the dough into 4 equal pieces. Roll out 1 piece of the dough into a 3/4-inch-thick rope. Cut the rope into 1-inch pieces and transfer the gnocchi to the prepared baking sheet. Repeat with the remaining dough. Roll each gnocchi against the tines of a fork to make ridges. Cover the gnocchi with plastic wrap and refrigerate until firm, about 20 minutes.

To make the Mushroom Ragu
In a large skillet, melt  the butter and the oil. Add the mushrooms and season with salt and pepper. Cook over moderately high heat, stirring, until tender and just browned, about 7 minutes. Add the shallots, garlic and thyme and cook until fragrant, about 3 minutes. Stir in the wine and cook until nearly evaporated, about 2 minutes. Add the chicken stock and season the ragu with salt and pepper; keep warm over low heat.

To cook the Gnocchi & Serve
Bring a large pot of salted water to a boil. Add half the gnocchi and simmer over moderately high heat until they rise to the surface, then simmer until cooked through, about 2 minutes longer. Using a slotted spoon, transfer the gnocchi to a serving bowl. Cook the remaining gnocchi. Spoon the ragu over the gnocchi and serve, passing grated cheese at the table.


Enjoy!
Julie